Posts Tagged ‘DIY’
Concept Proved
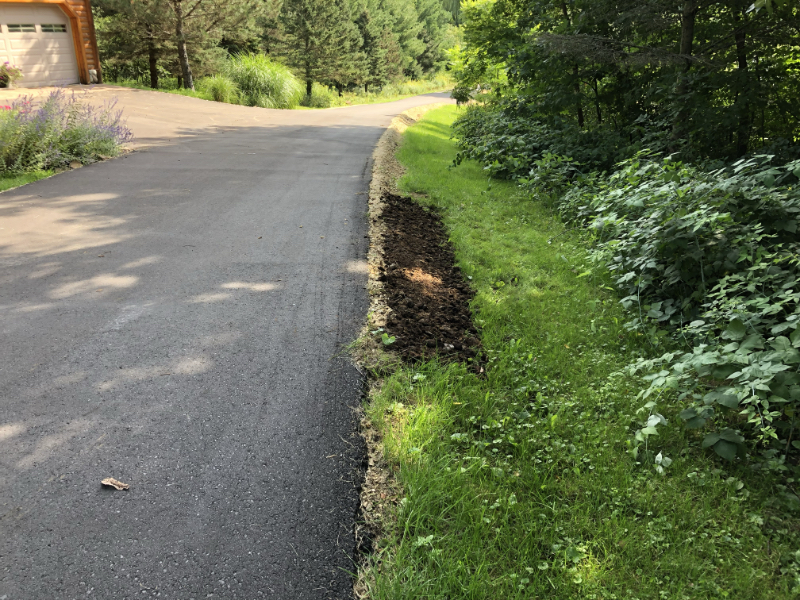
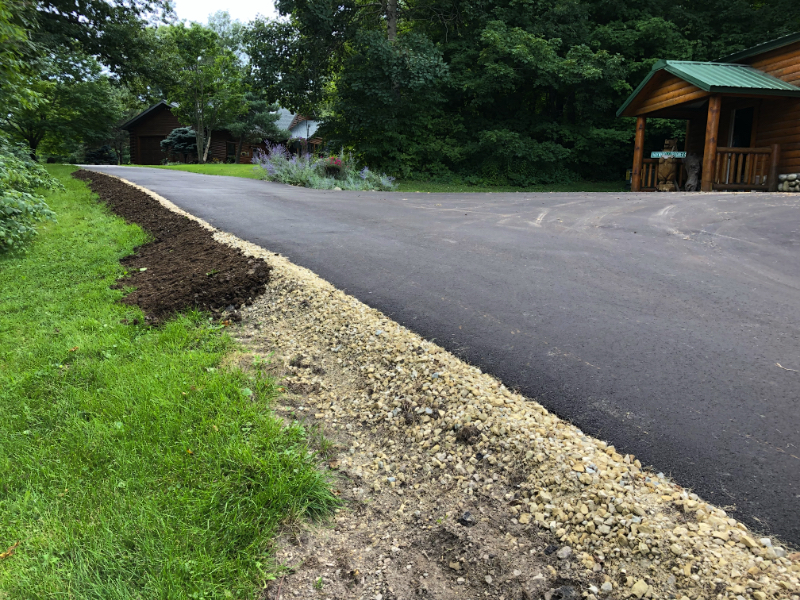
I did a test length of backfilling the sharp drop from the driveway’s gravel shoulder to the grass to soften the slope. We plan to toss some grass seed on that and call it finished.
 .
.
.
.
.
.
.
.
.
I think it is a reasonable improvement. Before we can actually achieve this level of finish, there remains a lot of distance of asphalt edge that is still exposed. I knocked off another 25 yards by myself yesterday. A little progress is better than no progress at all. I’m looking forward to Cyndie’s return tomorrow so we can double-team the job, which effectively doubles the distance we can complete in a day.
Actually, we have made enough progress toward getting the gravel pulled up over all the edges that seeing the shrinking distance that remains is starting to serve as “a carrot” enticing us to keep after it to get ‘er done.
I keep picturing the challenge I will have, come winter when I need to navigate the slopes of those edges to plow snow beyond the width of the pavement. The less steep we can make that slope, the better it will be for me for clearing snow.
Unfortunately, what I envision is that the blade will likely tear up much of the grass we might be able to get growing on those slopes by winter. It will give me extra incentive to be careful about keeping the blade up a few inches on the sides. I can hope that we get some good hard freezes before the first plowable amount of snow falls. That makes all the difference. If the ground isn’t frozen by the time I need to plow the driveway, it’s always a messy exercise.
I wonder if we will get much snow this winter. We didn’t buy the heated driveway option to melt snow off the pavement.
.
.
New Door
Back in May, Cyndie and I ordered a replacement storm door for our front entry. We were told the lead time was going to be 90-days. Happily, they surprised us by calling me while I was on my bike trip to say the door was ready for pickup much earlier than expected. I forwarded the message to Cyndie in case she might be able to swing by and get it before I got home.
The good news is that she was able to pick it up and save us a lot of money on a delivery charge. The bad news is that she forgot to pick up the handles. We didn’t pay for professional installation so that adventure landed on me. It was only supposed to be a couple of hours of work but it took me two long days.
 It will be time well spent because we were both growing increasingly irritated with the old storm door that had broken antique-looking handles, sagged on its worn hinges, and didn’t latch well without a manual assist.
Yesterday, after the errand to pick up the handles, I resumed the struggle of getting the frame mounted into the imperfect dimensioned opening so that the door would swing and close without obstruction. Minor modifications were required. I also needed to ad-lib a seal along the width at the bottom.
It was a massive effort of suspending my perfectionistic urges and allowing for “good enough” to carry the day.
The best reward came to me from hearing Cyndie report being happy with the way it looks. Now, if I can adjust things so it requires no assistance to close completely and also seal tightly, I’ll have achieved the jackpot of having it both work well and look good! Double bonus!
Too bad I will still remember the steps in the instructions that I couldn’t get to work as they intended. I’m going to try reframing my creative workarounds as icing on the cake of simply having a door that works.
Figuring out how to dispose of the old door and all its worn parts will become a project for another day.
.
.
Mukluk Retread
With a nod to some excellent directions found online at lostcreekadventures.org posted by Greg Weiss in 2017, Cyndie took her kitchen skills out into the shop over the weekend to resole her favorite Steger Mukluks. The original petroleum-based material on the sole can become dysfunctionally sticky as it ages, while the rest of the boot holds up almost as good as new.
To avoid a long wait for having someone experienced do the job for her, Cyndie bravely chose to do it herself.
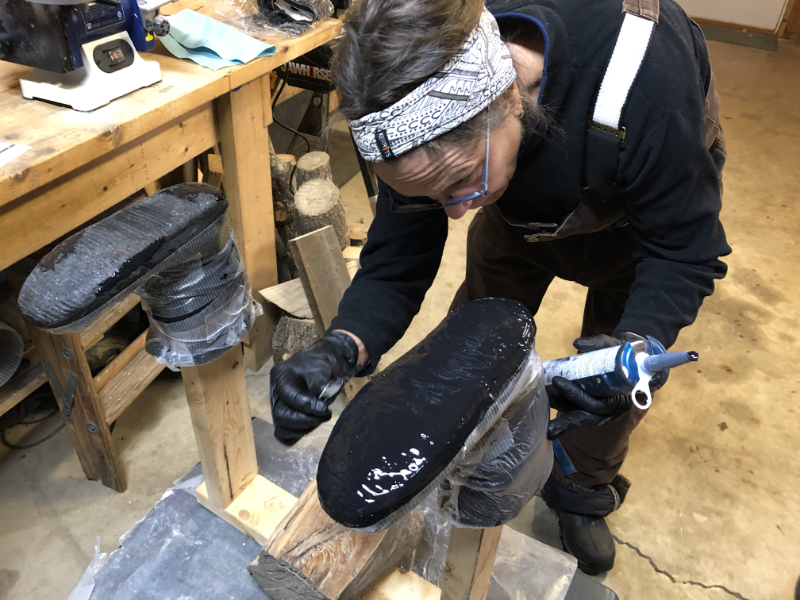
She just recently finished her first attempt at a classic Swedish princess cake that turned out spectacular and received rave reviews. How hard could it be to resole a mukluk? She procured all the ingredients on the “recipe” and printed out the directions. Instead of an apron in the kitchen, she was wearing overalls in the shop.

 .
.
.
.
.
.
.
.
.
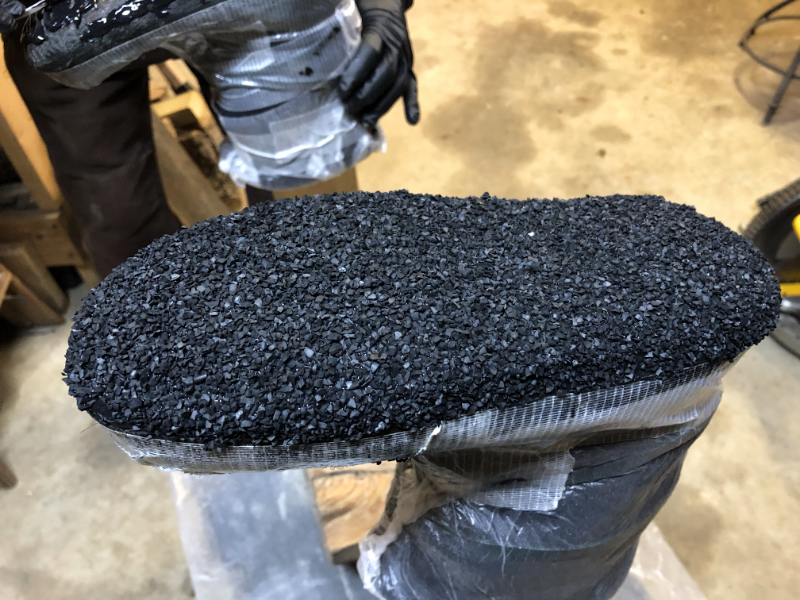
In order to assure the 3M marine adhesive sealant fully cures before testing the durability of the added rubber bits, the plan is to leave the boots alone for at least a week. I’m inclined to suggest a thin overcoat of the remaining sealant if she is willing to wait an additional week of curing.
Even if the project takes a month, it is still a year quicker than the waiting list to have someone experienced to do it for her.
Watching her work, I had to resist an urge to see how it tasted when she was done.
.
.
Updating Benches
The old log benches around the firepit up at the lake have aged to the point of being overly mossy and crumbling from decomposition. Another perfect opportunity for making use of the store of old lumber we saved from the resurfacing of our deck at home.
Elysa is up at the lake this weekend so I asked her to send me a photo of the benches as they looked yesterday.
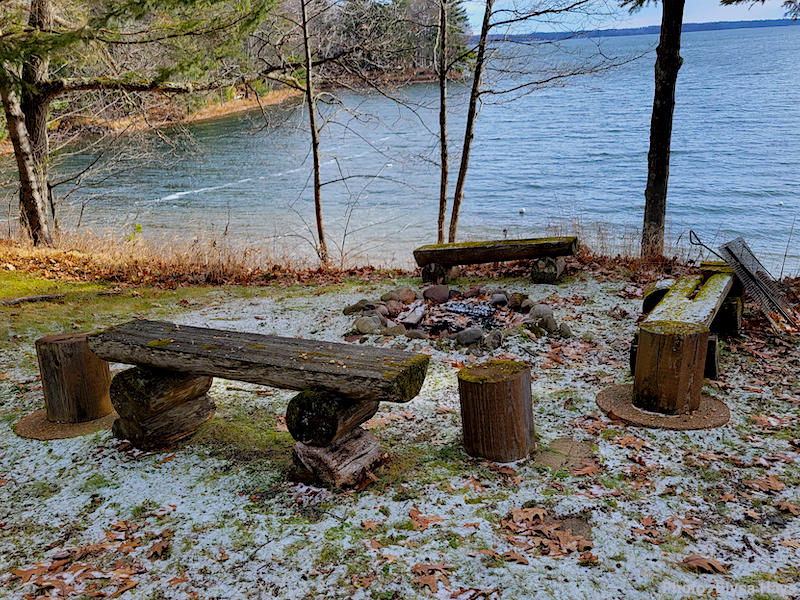
It’s fitting to use leftover lumber because that’s how the original benches were made when the log home was built at the lake. Twelve-inch cedar log pieces made for excellent firepit seating.
My idea for replacements won’t be made of logs but they will have some cedar boards and be custom made.
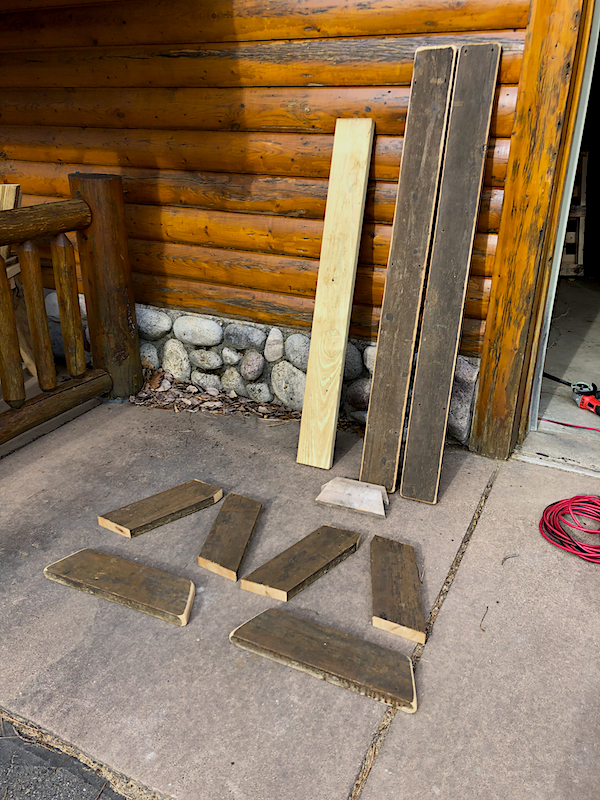
I mixed in some green-treated boards for the added strength and weight to bolster the finished benches. After measuring the old log benches, I designed one tall one and a pair of shorter versions to match.
The results are satisfying and I look forward to testing them out by the lake next time we get a chance to drive them up. The simulated firepit on my driveway didn’t quite match the desired ambiance.

Gives me extra incentive to make the trek up to our favorite place as soon as possible!
.
.
Reclaimed Materials
After leaving work early yesterday in order to ride up to the lake with Cyndie’s mom, we made quick work of slapping some shingles on the woodshed before the impending rain arrived. While still in the car, I watched a refresher video about shingling a roof. Then, I immediately disregarded the details about properly staggering the rows and made it up randomly as I went along.
It’s a shed for firewood, after all. Plus, the slant of the roof and the trees behind the shed make the rooftop hardly visible.
We were racing darkness, the dusk-related onslaught of mosquitos, and the dinner bell to achieve, at the very least, the top row before the evening rain started to fall.
I love that I was able to make use of old spare shingles from both our home and up here at the lake –two different colors. I think it contributes nicely to the rustic “at-the-lake” appearance of the structure.
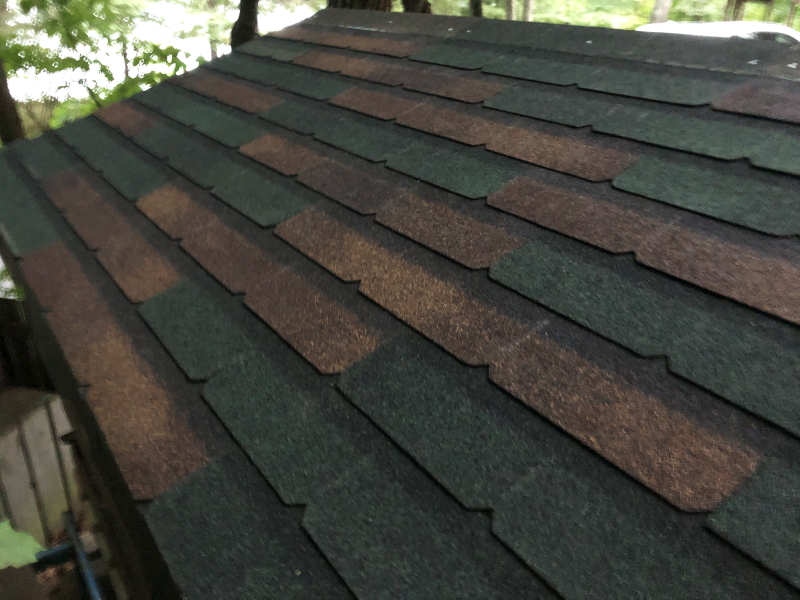
The only materials I needed to purchase for this shed were the screws, the four concrete footing blocks, and a roll of roofing felt underlayment. All the lumber and shingles were reclaimed material retrieved from storage.
I still want to put the finishing touches on the peak and trim some edges to feel my work is complete. I can accomplish those after the rain stops.
All that needs to happen after that is to fill the shed with split firewood and it will look just perfect.
.
.
Fence Maintenance
I’ve tried a number of methods in dealing with fence posts that get pushed up by the freezing and thawing cycles that occur in our location. Our land has areas where the level of ground water sits just below the surface. It will drop during extended drought, but otherwise it doesn’t take much digging to reach moisture.
Every time it freezes, the water expands and the pressure slowly but surely pushes fence posts toward the sky.
Upon consultation with the owner of the company that originally installed our fencing, I learned that they would likely use a skid-steer tractor and press down with the hydraulic bucket. He suggested I save their time and my money and use the same method with my diesel tractor.
So, I did, and was amazed at how easily that pushed posts down. Almost too easy. It requires painstaking control and mental focus to avoid wreaking total havoc by overtaxing the limits of the posts or cross planks. One wrong slip and I risk doing much more damage than improvement.
There is one other complication with that method that pretty much stops me from even driving up to the fence. The ground in many of the areas of pushed up posts is so wet that my big tractor would sink into the mud and create an even messier problem to be solved.
That led me to desperately trying to simplify the task by just pounding down on the most obvious posts that had pushed up. Several different techniques to protect the post from damage and get the right angle and leverage all brought minimal results.
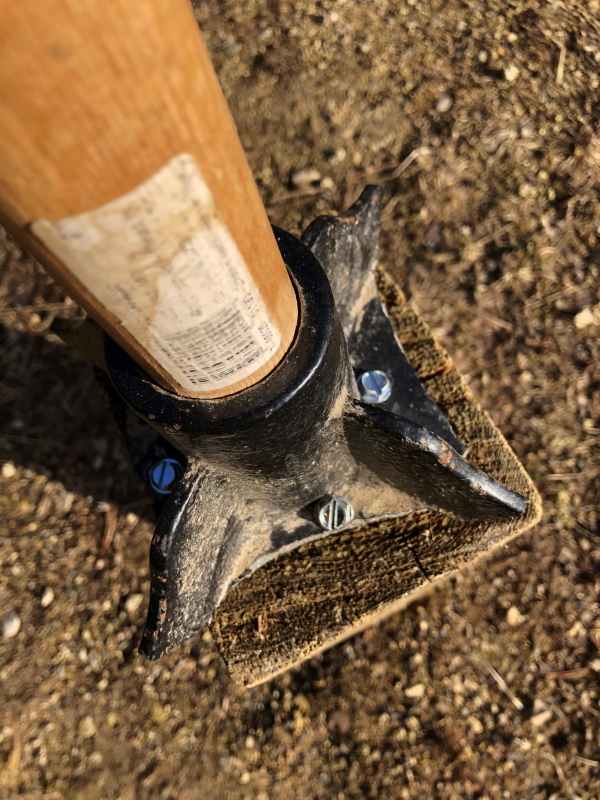
Yesterday spawned a new insight. I had a hand tool with a square steel pad for tamping soil that I figured would work to pound the top of the posts without damaging them. I also thought it wouldn’t hurt to add my 170 pounds of pressure to stand on a plank when slamming down on the top of a post.
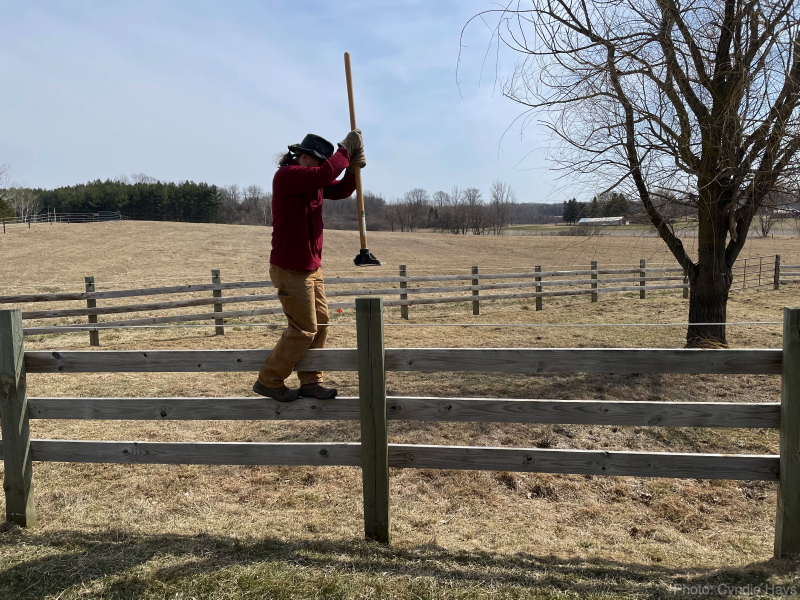
The thing is, I couldn’t feel if it was doing any good. I enlisted Cyndie’s help to watch for progress, which ended up providing great encouragement when she would report how much it was working.
I was thrilled. Right up to the point the steel tamper began to shatter under the mis-use. I tried to carry on, but the loss of weight in the tool seemed to diminish progress. Another tool was needed. We don’t have a specific sledge hammer, but I contemplated rigging something to use the wood splitting maul for the purpose.
That’s when the next inspiration struck. I could modify the broken tamper to make it the handle of a weighty block of wood that would match the fence posts I was pounding.
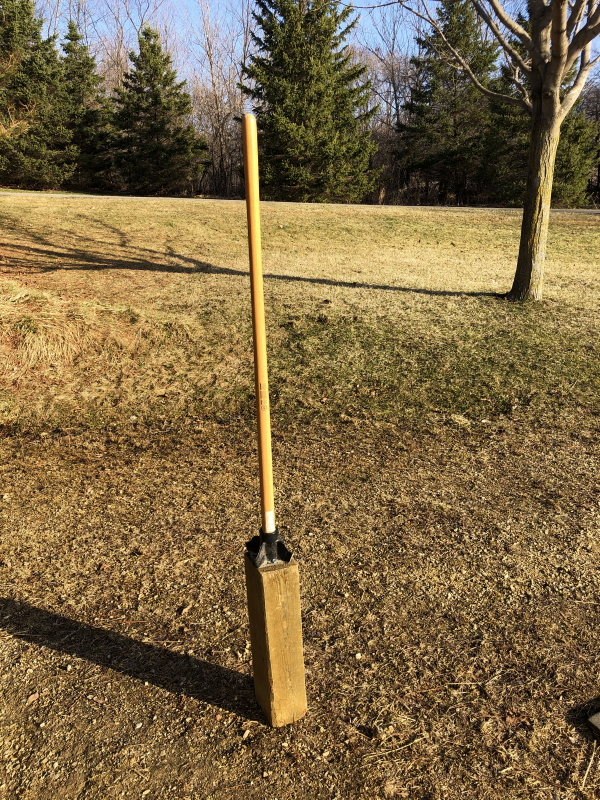
Look out fence posts. Here I come.
.
.
Brick Fix
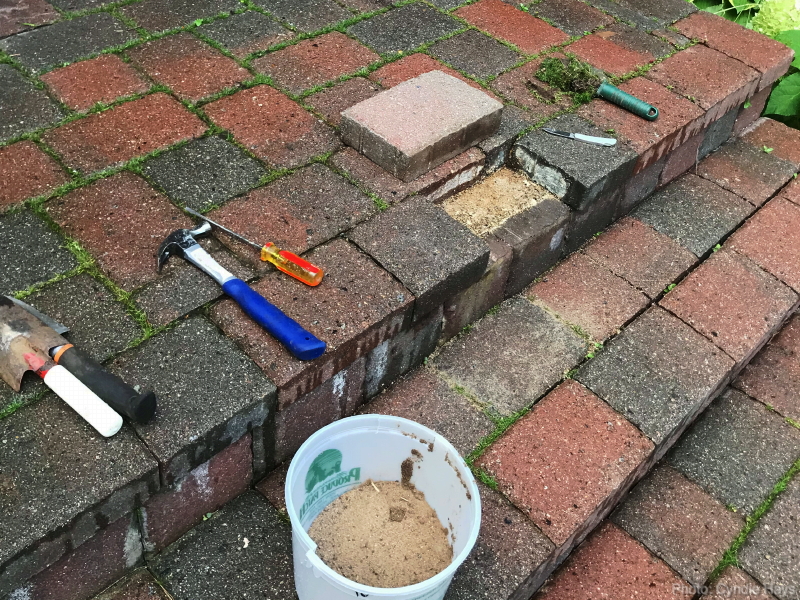
Okay, it was a paver, not a brick. We are up at the lake for the weekend! It’s the first time I’ve been up here all summer and the first thing I noticed was a gaping hole in the front steps.

After opening windows, adding water to the pond, and then cleaning out the gutter on the backside of the house (don’t ask), I decided that the busted paver deserved immediate attention. The only problem was, I had no idea how the steps were built. I didn’t know if cement was involved and if it would even be possible to remove just one “brick.”
So, I just started slow. Perseverance paid off and the paver eventually started to come loose. Once I had it out, it was time to hunt for a replacement.
Oh, yeah, that might have been a smart thing to figure out before tearing into the top, center step in front of the door.
With Cyndie’s help, we came up with a replacement paver and set about devising a process to install it.

 .
.
.
.
.
.
.
.
.
We are both quite proud of the result.

After that, it was time for a swim. Oh what a divine treat that was.
Topped off with a pizza from our favorite local restaurant, it was a wonderfully satisfying day for us.
.
.
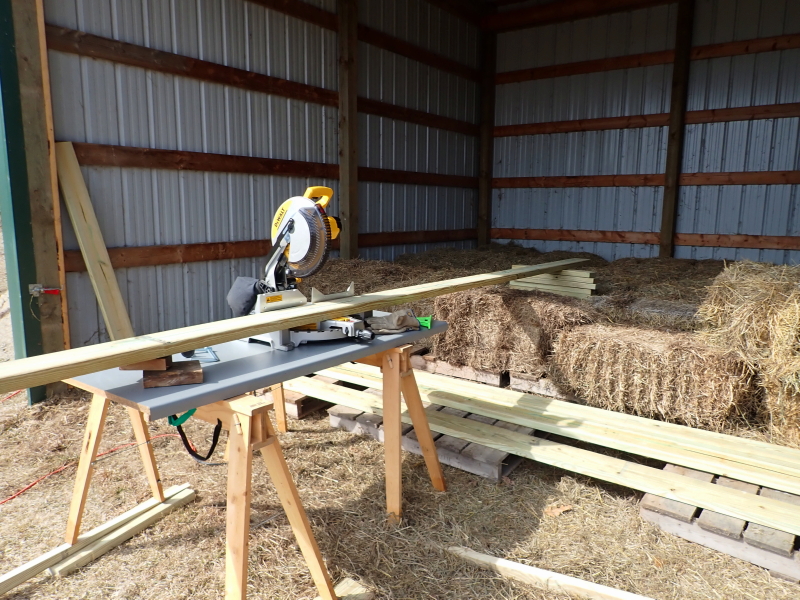
Working Alone
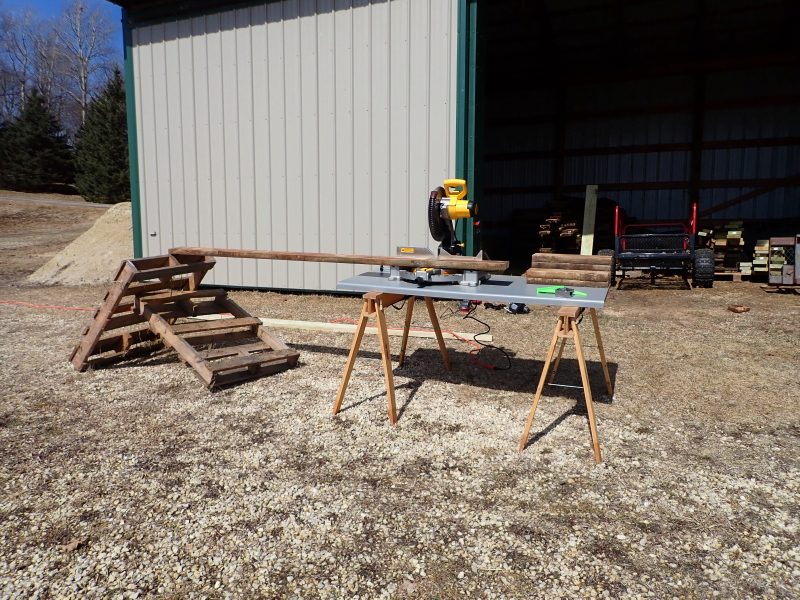
My high hope of building a footbridge in a single weekend fell victim to my need to accomplish all the tasks without a helper and also my being the sole entertainer for Delilah’s high-energy needs.
Add in the less-than-ideal windy and cold spring weather, plus the limitations of the batteries for my cordless circular saw, and my inability to finish by the end of the day yesterday was not all that surprising.
I resorted to two different solutions for supporting the long boards that I cut. That treated lumber is really heavy compared to the remnants of the old cedar deck boards I’m using for bracing.
 .
.
.
.
.
.
.
.
.
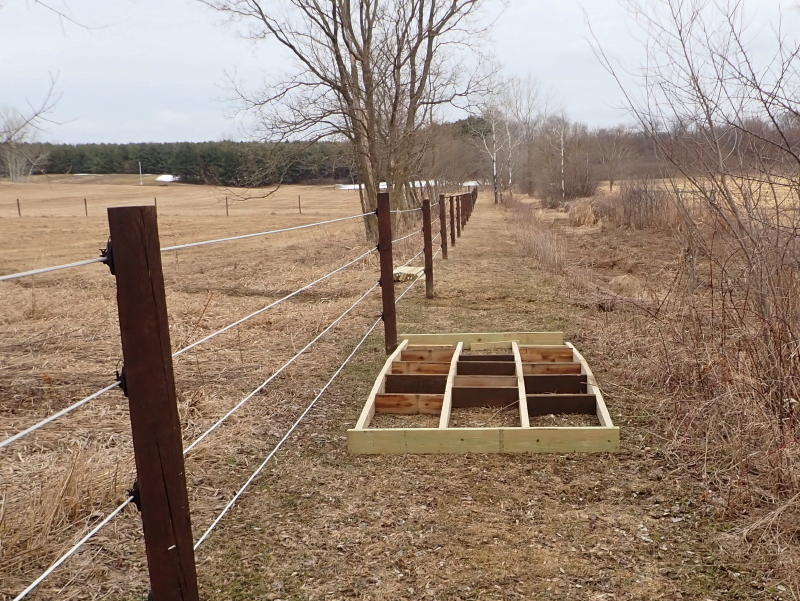
The pallets had a tendency to collapse, so I switched up to plan B on the second day: old moldy hay bales. That provided welcome consistency.
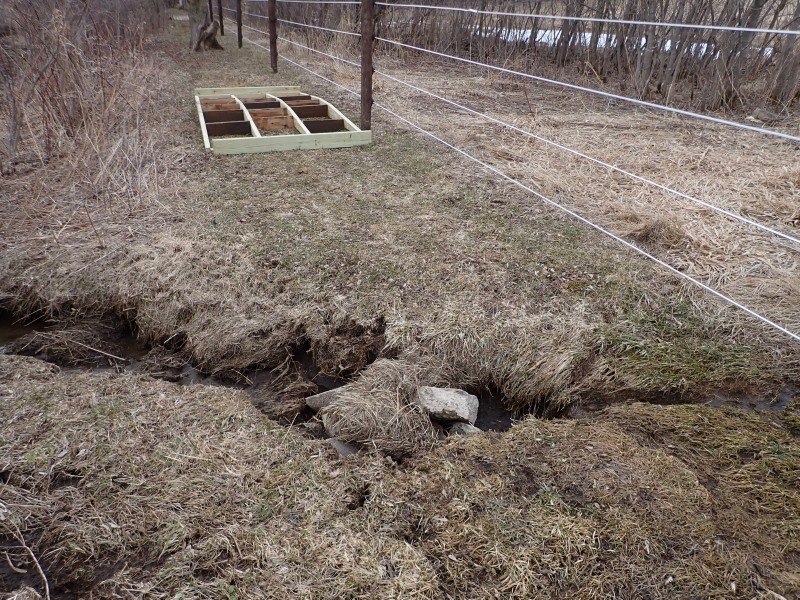
Because the bridge will end up being very heavy, I decided to build the frame right next to the washout I’m covering and then drag it into position.
 .
.
.
.
.
.
.
.
.
I was able to haul the boards down by the fence and begin to screw some of the cross-supports into position but quit when the time had passed for Delilah’s dinner. I’ll leave the finishing until next weekend.
Trying to screw the pieces together square and true proved challenging on the uneven ground. I want to give that the time and attention necessary to get everything precisely the way I want it. Then I plan to move it into position before screwing down the floorboards.
I’m not sure I’d be able to lift it if I waited until it was completely built. I mean, not without someone with a strong back to help me.
.
.
Sappy Mess
We are guessing there is a trick to making wreaths out of pine boughs that we don’t know about. If you have been following along, last month we lost a pine tree in a storm and Cyndie saved branches for holiday decorating.

When I came inside from plowing the driveway last night, the house was heavily pine-scented as production was in full swing.
What we don’t know is how others who work with pine boughs deal with the sap. Cyndie has resorted to wearing gloves, but has not mastered preventing the sap from getting everywhere.
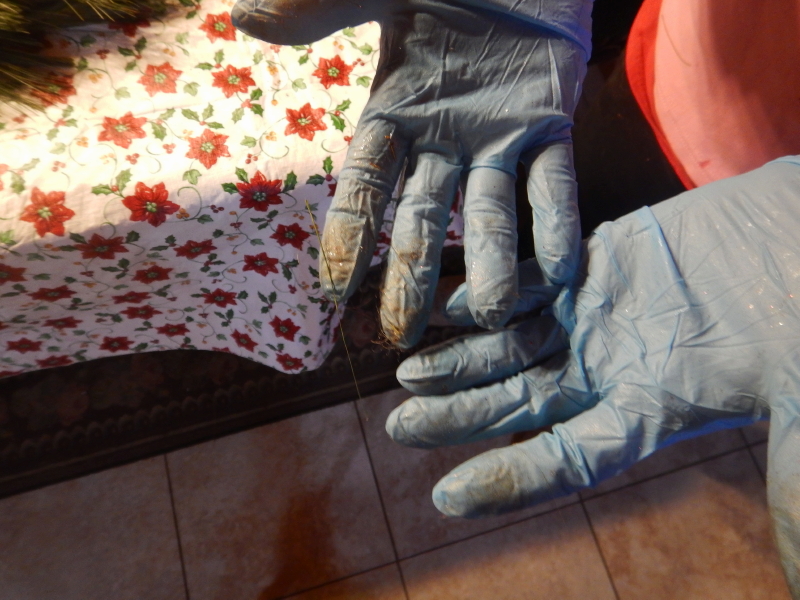
She decided that she would include a pair of gloves with each wreath when she delivers these beauties to the intended recipients.
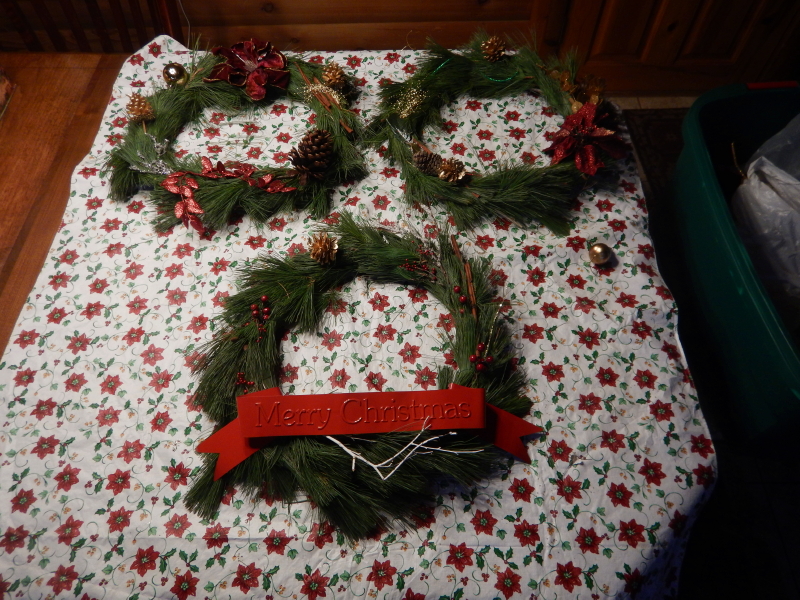
Don’t these look festive for the season?!
They sure smell good, too.
.
.
Playing Plumber
Picking up where things left off Saturday night, I started Sunday with a trip to Hudson to pick up the new kitchen faucet fixtures I bought online the night before. Around twelve hours after discovering the problem of dripping water beneath the sink, I was driving home with the solution in my possession. What a luxury to have such easy access to the specific items we seek. 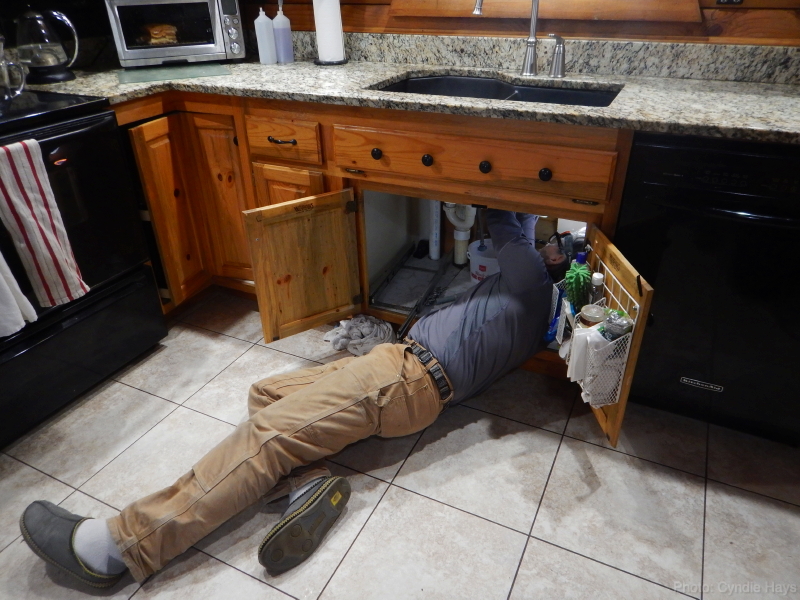
For all the times I grump about the problems related to over-consumerism in society, I do benefit from the conveniences offered.
However, despite all the benefits of readily available goods, the faucet still didn’t install itself. This morning my body is a little stiff and sore from playing plumber for the hours spent figuring out how to dismantle the old leaky parts and then reversing the process to install the new set.
Much to my great satisfaction, the details of this plumbing project were all within my ability to deduce and execute, despite having little experience with plumbing.
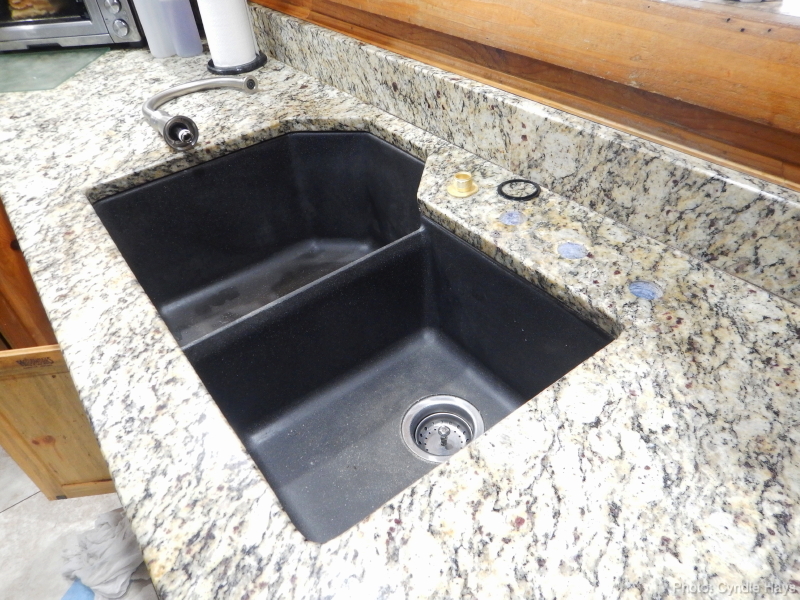
Twice, I was able to get a little extra practice by doing things over after discovering I had made errors. The whole time I was working on this project, I thought the line with the drippy shutoff valve was the cold water supply, so when I did the initial flow test, I discovered I’d connected the lines wrong.
Easy to fix, so with only that single trip to the hardware store, I completed the sink project in time for lunch.
 .
.
.
.
.
.
.
.
.
That left me the afternoon to suffer clearing some of the most un-fun snow ever that was the result of Saturday’s rain and the following flakes that relentlessly continued to blow across our land off and on since.
Both shovel and plow were only half a match for the underlayer of frozen crunch that sometimes popped free with ease, but more often stayed welded to the ground below. Trying to clean it all up was a relatively thankless task, which made it easy to retreat from the battle after a minimum effort and seek a few moments of chill in the easy chair before Sunday was completely over.
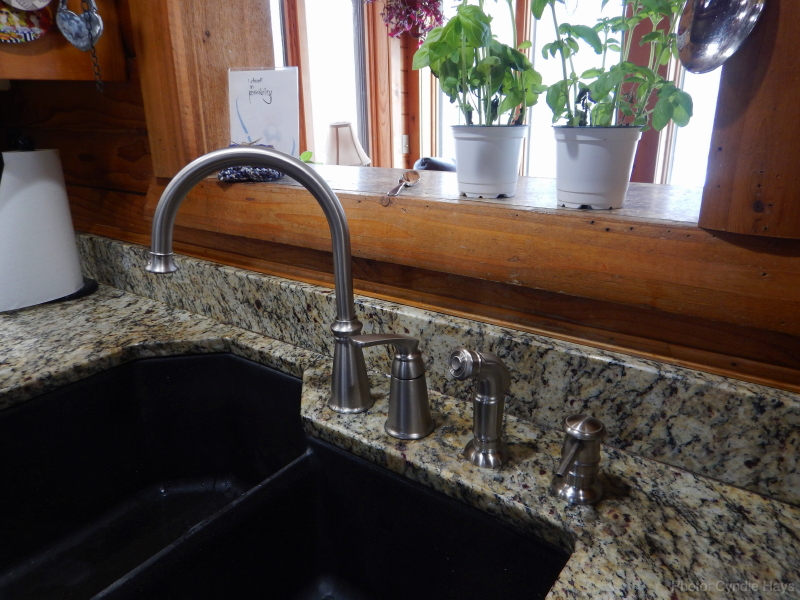
I thoroughly enjoyed washing my hands at the kitchen sink when I got in.
.
.


