Posts Tagged ‘DIY’
Like Dad
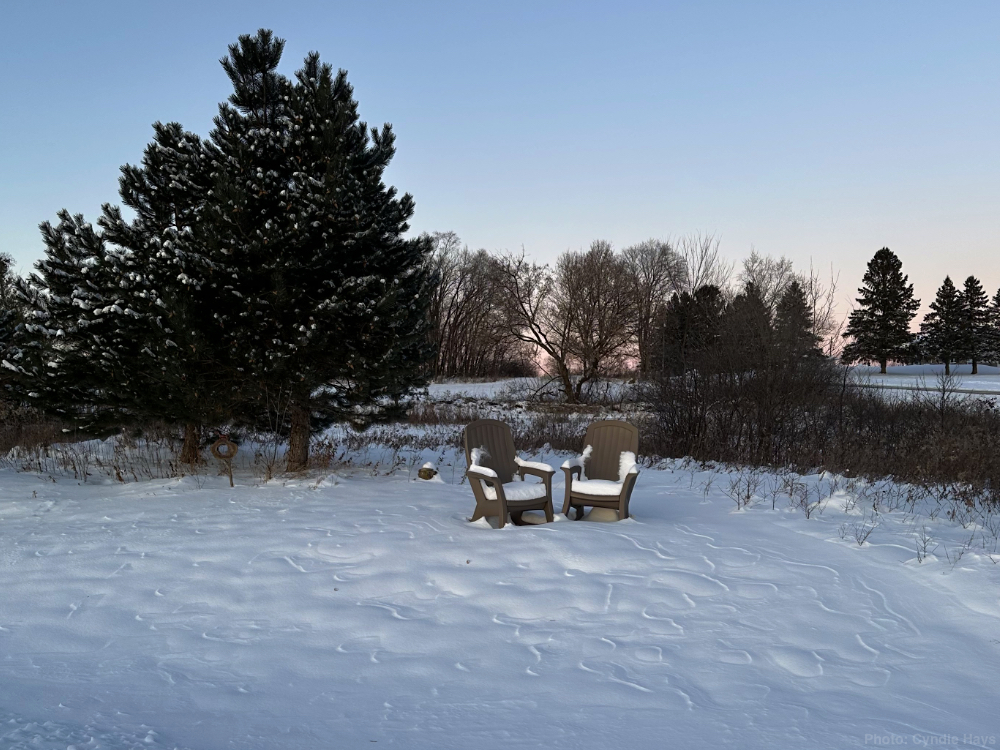
Baby, it’s cold outside. The horses had frosty whiskers this morning, to rival all the other deep-freeze overnight lows they’ve endured in their time with us.
While the air was exceedingly crisp outside, the house was toastier than Santa’s workshop with Cyndie’s Christmas Cookie-palooza, Day 1, in full swing. The double oven was working overtime to keep up with all the delectible treats Cyndie and her team of guests were moving through it. The post-bake decorating station was a spectacle this year, with frostings and sprinkles applied to the wafting sounds of a unique mix of Christmas music, courtesy of some algorithm at Apple Music.
Since I was in charge of keeping the fire fed in the fireplace and the dog’s nose pointed anywhere other than at foodstuffs, I let the whole operation pass without taking a single photo. I apologize. That was a total lapse of thinking on my part. I did get a shot of some behind-the-scenes aftermath, though.
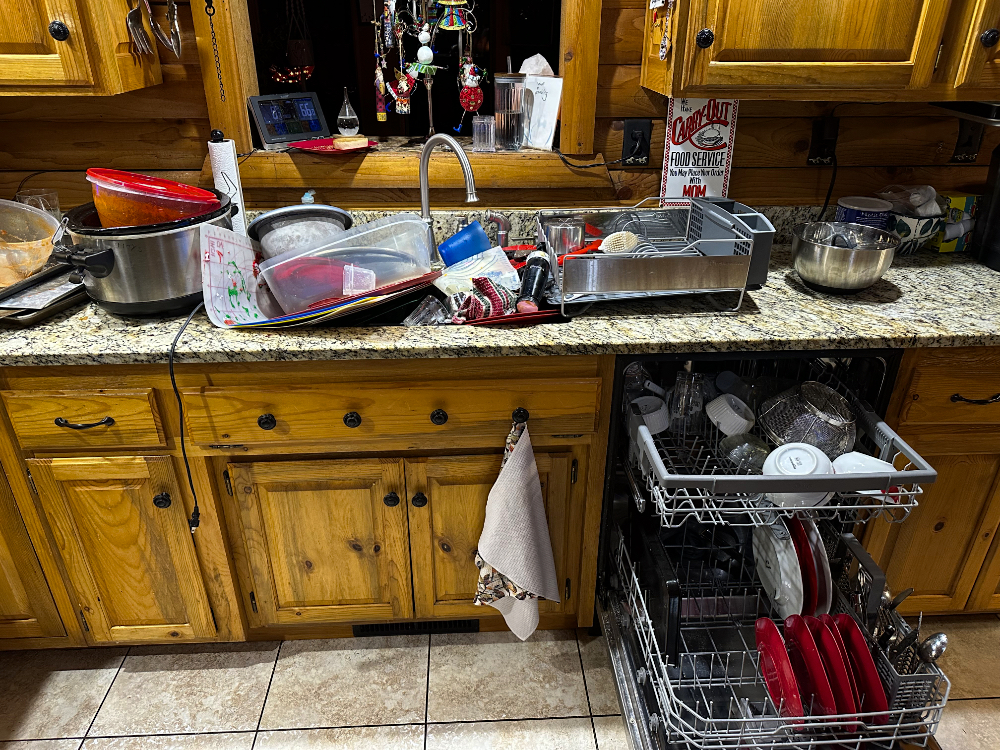
I stopped by the kitchen to take a photo of a recent success on my part that had me thinking of my dad. A little of his mechanical ingenuity and DIY solutions were passed to me, along with his exceptional ability to tolerate unfinished projects.
For some 10 or 12 years, Cyndie has begrudgingly lived with a problematic corner cabinet that has a pair of lazy susan shelves where we store pots and pans. When it would get stuck, I assumed it was because pan handles weren’t being oriented logically, or it was being overstuffed. When it became stiff, a confident nudge from my foot would close it just fine.
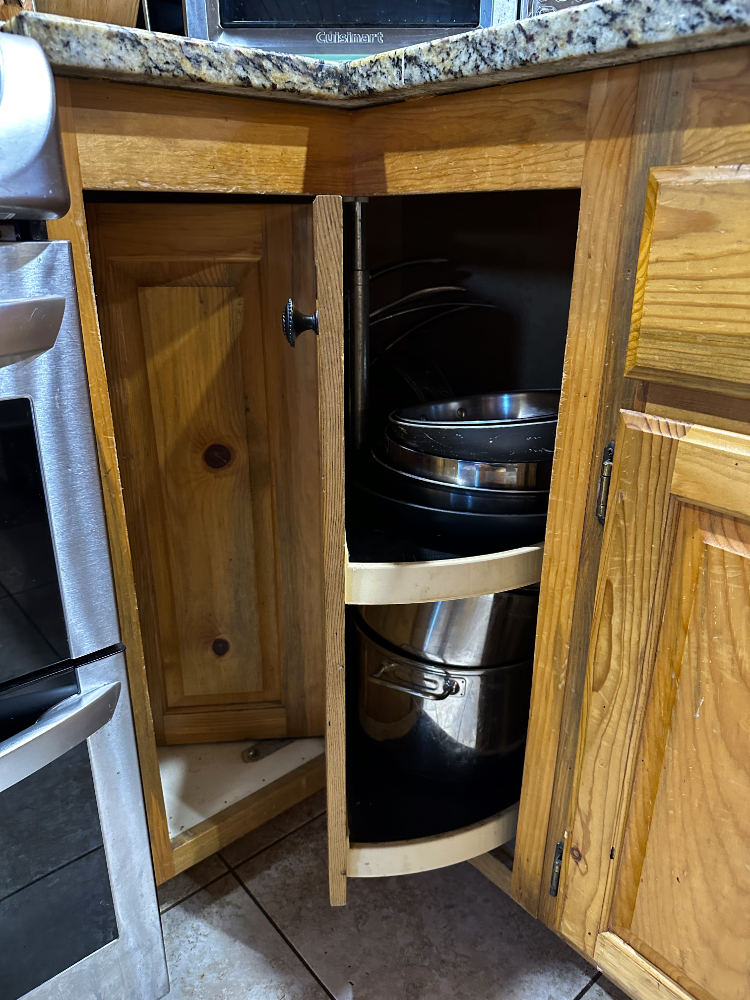
When the shelves finally collapsed from the top and bottom brackets two days ago, I was forced to figure out how it was supposed to work. How the heck did they install it in the first place? Oh, there are adjustment screws. Hmm.
I discovered there was a detent in the plastic top piece that was supposed to match the springy metal brace. Imagine that.
A Philips screwdriver, ten minutes of puttering with adjustments, and we had a perfectly functioning lazy susan corner cabinet. I could have done that years ago. I suppose Cyndie wouldn’t be quite as thrilled with the results if it hadn’t been an ongoing nuisance for a decade.
The quick fix had me feeling chuffed. Figuring out how it was supposed to work reminded me of my dad’s keen skills in that realm. Realizing I had let something go for years without properly solving it dampened my pride and reminded me that I inherited both good and bad traits from that wonderful, complex, ingenious, troubled man that I both looked up to and feared in the years we were both alive.
I think Dad would have approved of the way I fixed that corner lazy susan by figuring out the way it was intended to work.
I’m going to focus on that and not on how long it took for me to get around to it.
.
.
Busted Brackets
Upon closer inspection of the mounting system on the ATV plow blade, I discovered significant mechanical failures. I completely missed it when I became overly focused on not being able to slide the pin back to change the blade angle. The two brackets that hold a pulley had fractured and then bent.

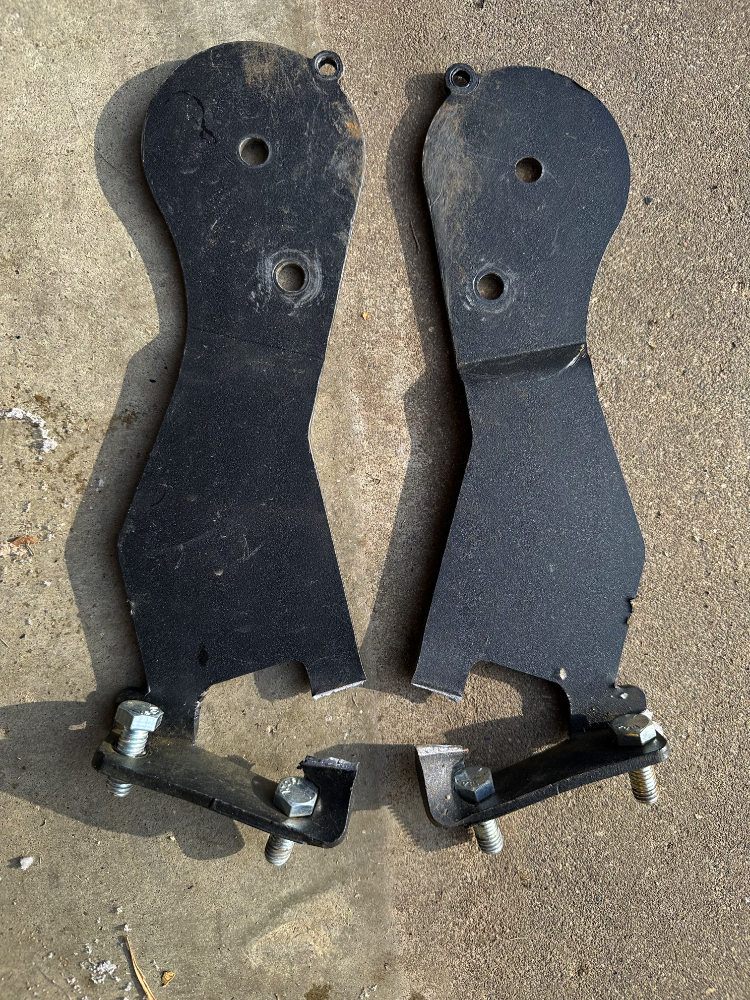
Oops. No wonder things weren’t working as well as they used to.
I took everything apart, lubricated the pin to make sure it moved freely, and then retrieved the U-bolt that had previously served as the winch cable attachment point. Replacement brackets were going to cost more money than I wanted to spend, so I’m reverting to the old way, with one added trick I’ve learned.
Those brackets that broke held a pulley that increases the mechanical advantage for lifting the blade. I found that I already have a pulley I can use that won’t require a bracket to get the lift I’m seeking. That problem is solved; however, the pin is still getting hung up somehow, so I can’t change the angle of the blade yet.
A little more tinkering needs to happen today. I ran out of daylight by the time I got around to testing the reassembled hardware yesterday. If I can figure out what’s keeping that pin from sliding easily and resolve the issue, I’ll be back in business for plowing snow.
Just in case we get another dose of snowflakes piling up more than a trace amount.
.
.
Months Later
You could call it “John Standard Time.” Sometimes it takes a while for me to execute. Here is a pretty good example…
The story has a background that goes back years. Many years ago, in fact. The old day job in manufacturing had a small bandsaw purchased from Harbor Freight for cutting metal. One day, the switch burned out, and the owner opted to simply replace the saw with a new version of the same model.
I’m not sure what got into me, but I told him I could take the old one off his hands to save him from figuring out how to dispose of it. I found a replacement switch and had myself a very inexpensive saw for my shop. In the last decade, I’ve used it to cut metal only once or twice. A couple of times, I used that metal-cutting blade to cut wood. It was slow, but it worked.
That inspired me to look into buying a bandsaw blade intended for cutting wood, even though that wasn’t what this saw was designed to do. The speed wasn’t as fast as it should be, but since I had some success misusing the metal-cutting blade, I figured it was worth trying to undercut the specs on a wood-cutting blade without a major loss if it didn’t work out.
Not knowing anything about what I was doing, I called to speak to a blade expert at a company I found online. He was kind enough to educate me to the point of being able to pick a blade for my experiment, even though he knew I didn’t have the correct bandsaw for the job.
By Christmastime last year, I was pressured to come up with a wish list of ideas for gifts I’d appreciate, so I put the blades on my list. Surprise! I got a box with two perfect wood-cutting bandsaw blades.
It took me another five months or so to get around to installing one of the new blades on the saw. That exercise was not a pretty sight. I had no clue what I was doing and fumbled my way through several failed attempts, and gained multiple irritating cuts on my fingers.
 Then, I ran into a problem when I tried to move the belt on the pulleys to the fastest speed. The two pulleys in the diagram on the saw appear to be installed in opposite orientations, but the actual pulleys on the saw were installed identically to each other.
I let another month pass until I had a chance to ask the advice of friends with mechanical knowledge. One of them knew the exact bandsaw. They agreed that one of the pulleys was on wrong and told me it was easy to fix.
Two months after that, I got around to trying to find the set screw that holds the pulleys on the shaft of the motor. It took some tenacious hunting, but I found it, and after many tries in low light, found the Allen wrench that fit.
A few days ago, I made my first attempt to cut wood. It worked like a warm knife through butter. Merry Christmas!
Look out world, I’ve got a whole new weapon in my low-tech woodworking hobby.
Why, in a few months or twelve, I might finish making another snazzy woodgrained something-or-other.
.
.
Head Start
I got a head start on my next adventure by driving up to the lake place last night, a day early for the annual Golf Weekend hosted by Cyndie’s brothers, Steve and Ben. Several years ago, they started including me even though I don’t golf. Since several guys like to ride bikes in addition to their golfing, I bring my bike and let them put me through a workout of trying to keep up with them in the woods or on the road.
 I’d like to use the excuse that I am getting too old for this, but they are the same age as me, so that doesn’t work.
By coming up a day early, I’m forcing myself to take a break from the groundskeeping work that never ends when 20 acres are growing at a frenetic pace.
Actually, I made great headway cleaning up the pathways and edges of trails through the woods over the last seven days. Some of the growth is beginning to take on a rather hedge-like appearance in several places around the property. That is just what I’m after.
I snuck in a few minutes of bike maintenance the other day, trying my hand at adding sealant to my tubeless tires for the very first time. I made one foolish mistake. Since I was trying to simultaneously entertain Asher, I moved my bike down by the barn, where he loves to sit in the shade of a tree and watch over his kingdom.
At that location, I didn’t have a convenient station for the bike, so I just leaned it against a barn door. I should have flipped it over, but I wasn’t thinking. When I added the sealant to the front tire after deflating it, the weight on the wheel flexed the tire, and a lot of the sealant leaked out of the bead. D’oh!
It was doubly maddening because the front tire was the one losing air faster than it should. I solved that error before doing the rear tire, and the process worked flawlessly. Luckily, the “refresh” of sealant, even though not the full amount, seems to have plugged the leak in the front tire. It’s holding pressure just as well as the rear.
Having never dealt with tubeless tires before, I was feeling a little intimidated by the whole sealant process. Now, after just one experience of adding a new amount, I see that it is not a big deal at all.
I’m going to give my tires a little road test this morning and get a head start on checking out my favorite road routes before the other riders arrive. As a bonus, I won’t be doing any mowing at all for the next few days.
.
.
Pickling Around
Opting to remain at rest since my body was already at rest when yesterday’s post-4th-of-July pickleball tournament was held, I wandered down to observe as a spectator after the competition was already underway.
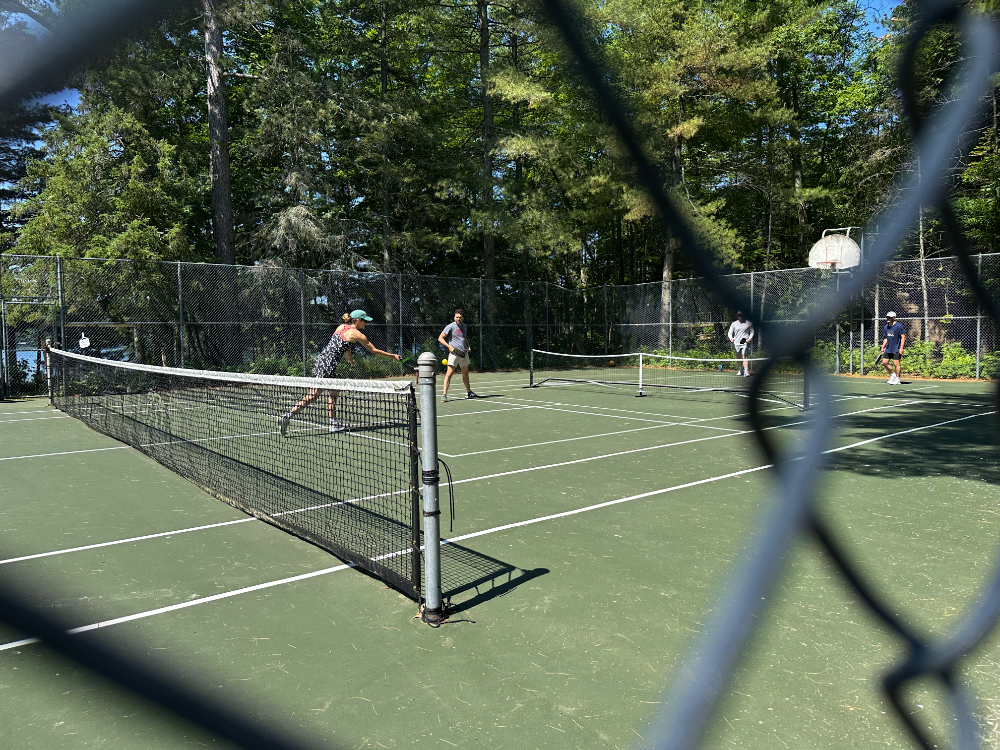
They achieved a good number of participants who did an impressive job of keeping games close, providing plenty of entertainment for the gathered crowd, made up mostly of other players waiting for their next game.
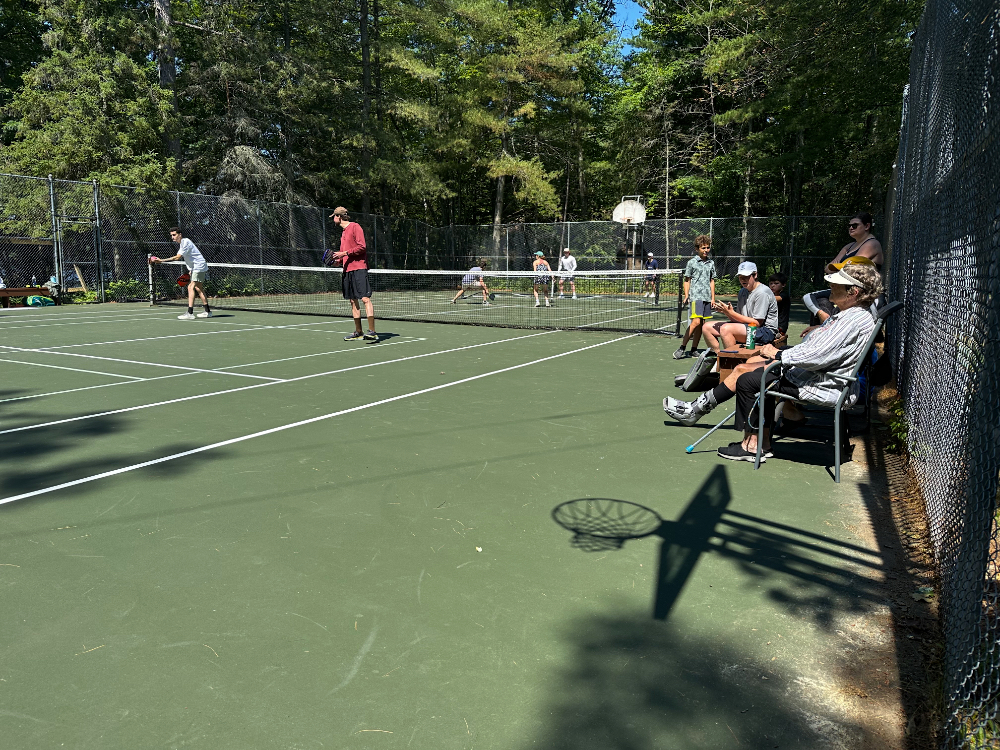
After I’d witnessed at least one game by most of the teams, I made my way back to the house by way of the beach, where I paused to hang for a bit while Cyndie, Elysa, and Ande were floating on or soaking in the lake. After so many days away from home, I’m finally getting the hang of doing nothing without needing to convince myself I can get away with it.
In fact, it feels a little daunting to contemplate revving my energy up again to tackle all the projects that will be awaiting me back at Wintervale. We expect to be on the road before noon today for the drive south to Pierce County, where we will find the hay field has been cut and baled, and the lawn grass about two weeks tall.
Yesterday afternoon, I took on a challenge I’ve been skipping over for a long time. I keep an old floor pump for inflating bike tires up at the lake place, ever since I bought a nicer one to replace it at home. The thing is, the old one leaks air on every stroke. One of the reasons I haven’t dealt with it is that I couldn’t easily deduce where the problem was, nor how to get the lower pieces apart to get a look at what was wrong.
Finally, yesterday I was prepared to give it a go. First off, I did some research to see if I could find an exploded view or service information on this old model. I could not. I surfed through a few YouTube videos, but didn’t find any answers there. I did find some replacement parts that looked identical to my model, but nothing that revealed how it came apart.
I tried pulling with increasing force, but wasn’t making any progress. Then, I had a lightbulb moment of insight. One of the replacement parts I had seen included a hose. I searched for that image again and zoomed in. The end of the tubing had a threaded fitting on it. That was the secret. I needed to find a pliers because the rubber boot over the mating part did not budge against my finger strength. Knowing it should turn allowed me to grab it using pliers with much more confidence.
It came loose easily. All the subsequent connections unthreaded with ease as well. The broken gasket at the bottom junction became glaringly obvious.
I felt pride in having used my mechanical sense and a good dose of patience to work out the problem without breaking something in the process. It just took a little pickling around with the parts before I eventually reached the desired result.
I’m taking the ripped gasket home with me to see if I can find a suitable replacement. If not, it will be time to make one myself, probably by cutting up a discarded inner tube. Wish me luck.
.
.
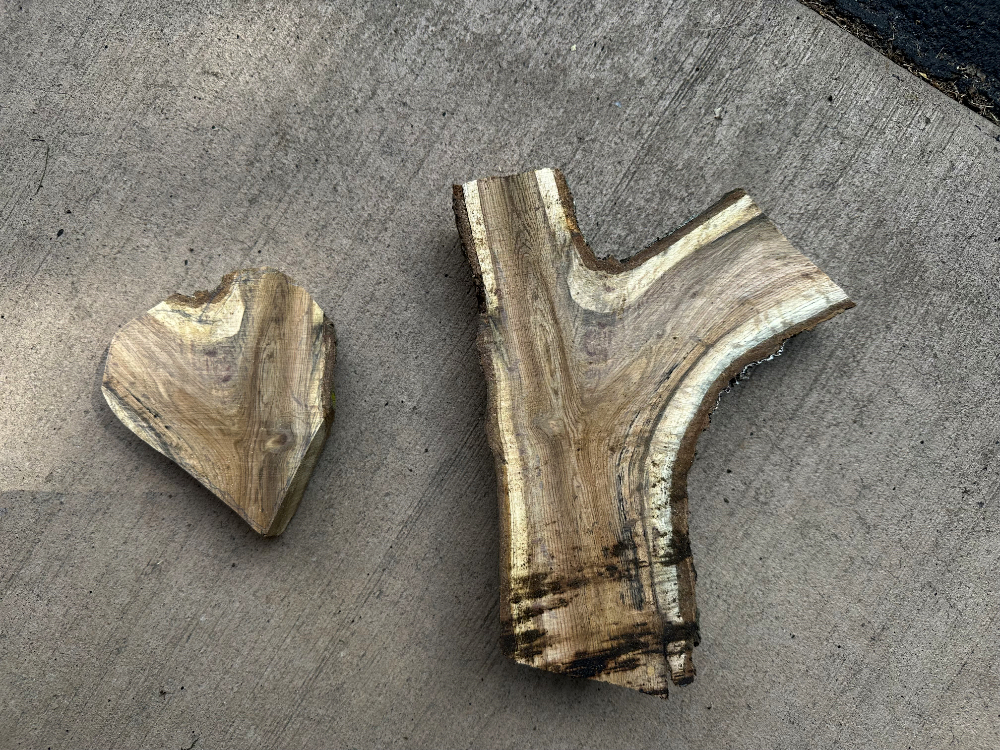
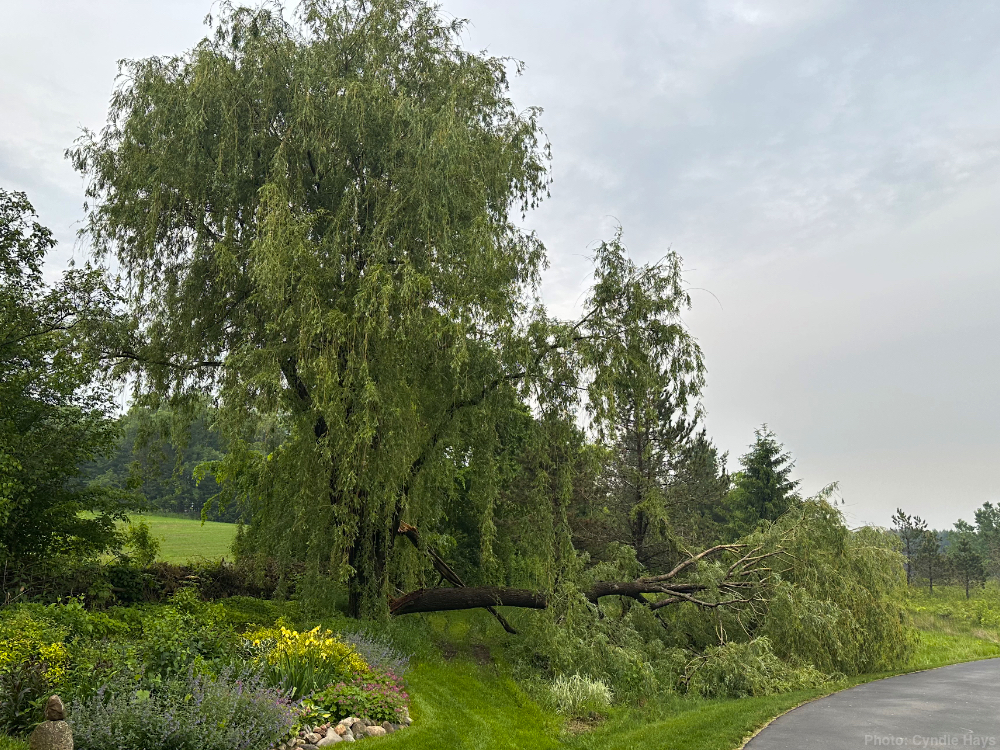
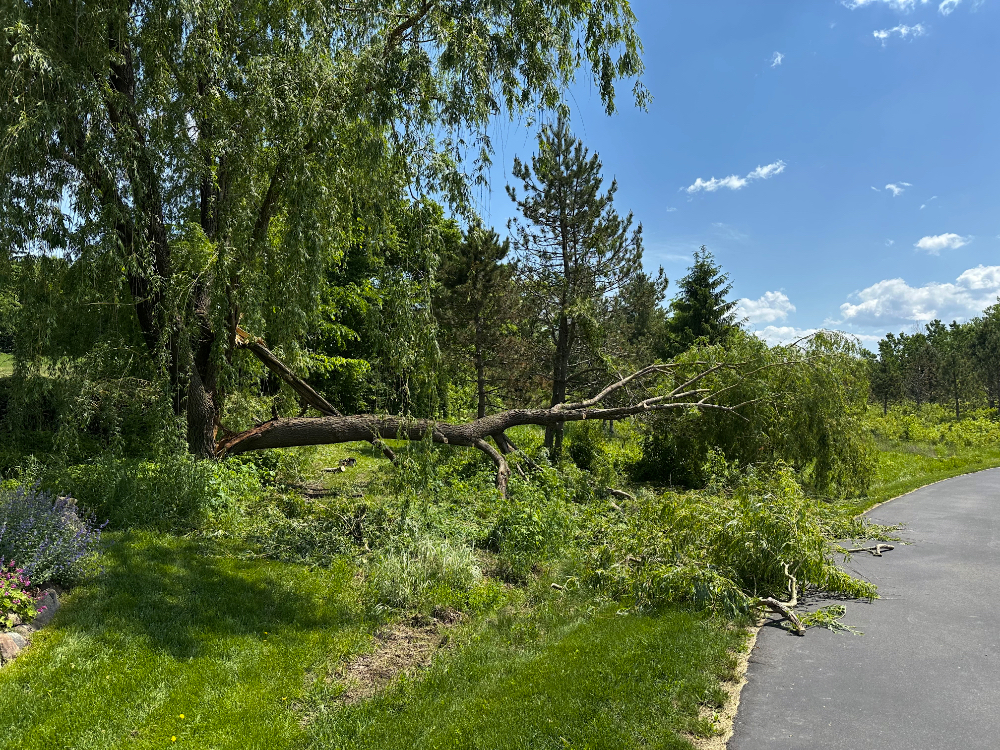
Lotta Tree
It happened again. This time, the big willow tree by Cyndie’s perennial garden lost a third of its trunk when the added water weight from the more than 2 inches of rainfall brought down the section with the most lean.
 .
.
.
.
.
.
.
.
.
To make clean-up more interesting, it dropped into one of the more hearty patches of poison ivy on our property. Generally, we avoid setting foot anywhere the poison ivy grows. Yesterday, with a heavy dew soaking everything, we found ourselves up to our elbows in poison ivy. I fell down into it once when a branch I was tugging on broke free. Cyndie got splashed in the eye by moisture from the mix of ivy and tree leaves as she pulled branches out of the tangled mess.
It will be a miracle if one of us doesn’t break out in a rash in the next few days. We vigorously washed with special soap and tossed our clothes aside for segregated laundering.
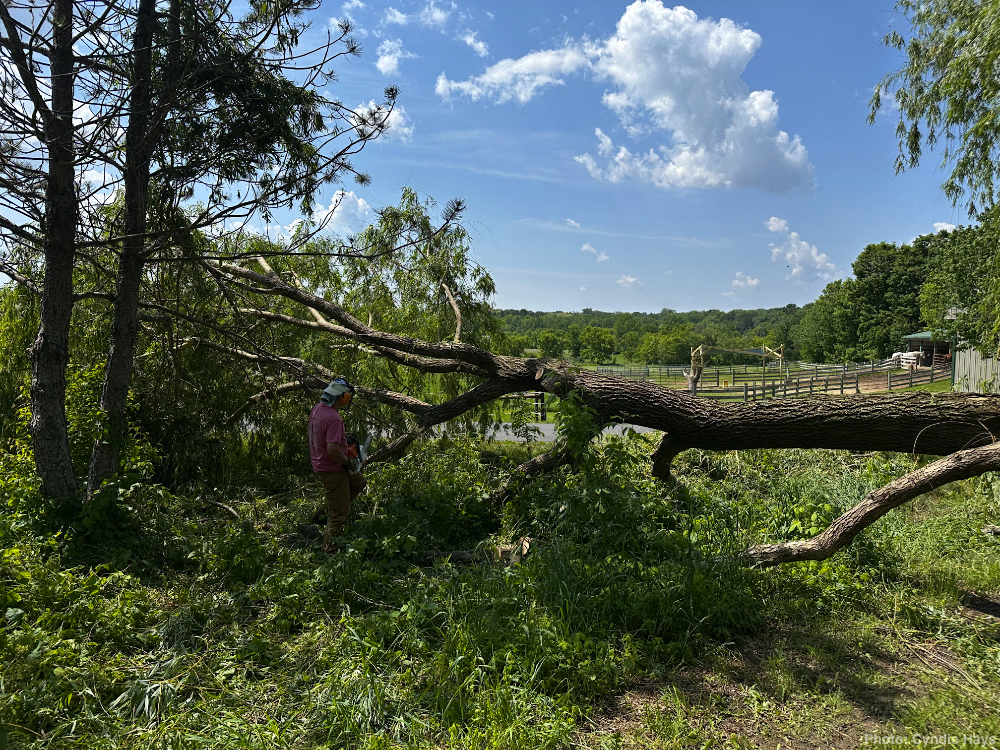
I worked my way into the now-horizontal crown of the tree with the big chainsaw, being careful to avoid cutting something that was under tension that would either pinch the blade or shift the heavy trunk. When I had cut as much as I could reach, it became clear I would need to get the pole saw.

After I had removed as much of the weight as possible from the extended limbs, I started in on the biggest parts of the trunk. At one point, a trip up to the shop garage was required to get a pry bar to roll the beast so I could finish cuts. Throughout the entire effort, which consumed our whole day, we only needed to wrestle free the pinched chainsaw blade three times.
It seemed a little unfair that we were doing this again so soon after wrangling the fallen maple tree in the backyard. It was doubly worse because of the added hazards of poison ivy everywhere we worked. However, the saddest part about the timing of all this was that it was Cyndie’s birthday. Cutting up and tossing branches was not the spa day she would have preferred.
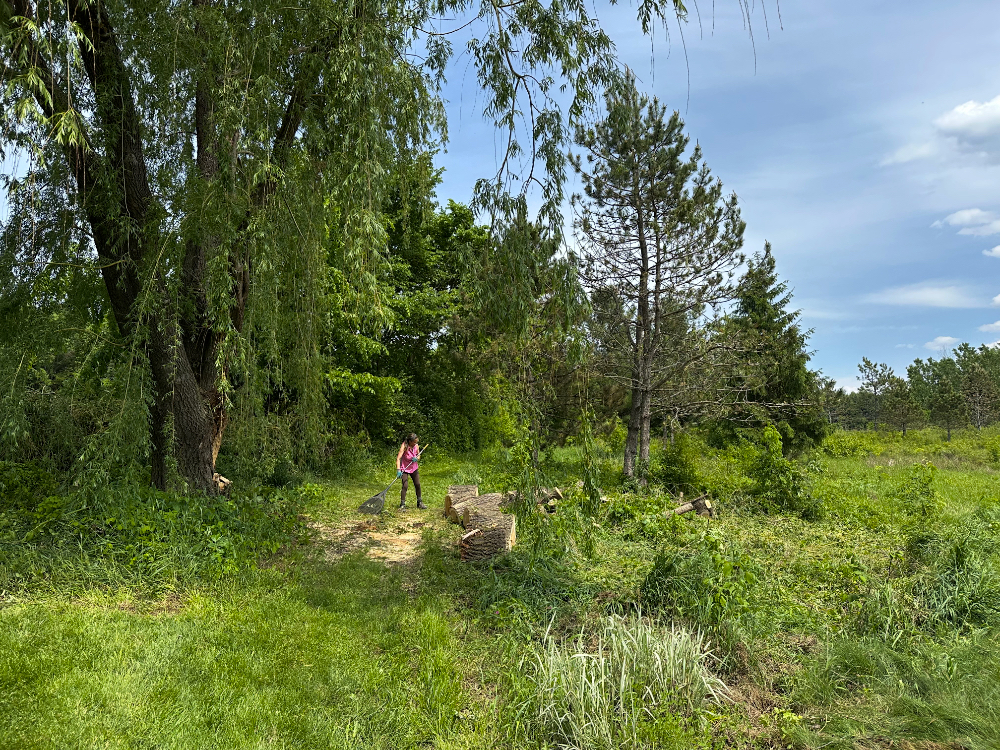
That was a lot of tree to process. We put all three sizes of our STIHL chainsaws to good use on the relatively soft wood. Man, that battery-powered trimmer saw is a handy tool for pruning branches.
Our priority of getting that work done was related to the fact that we are heading up to the lake today for the weekend with Cyndie’s mom, Marie. After the big physical effort to get through all that tree, we are looking forward to a few days of R & R on Big Round Lake.
.
.
Sail Up
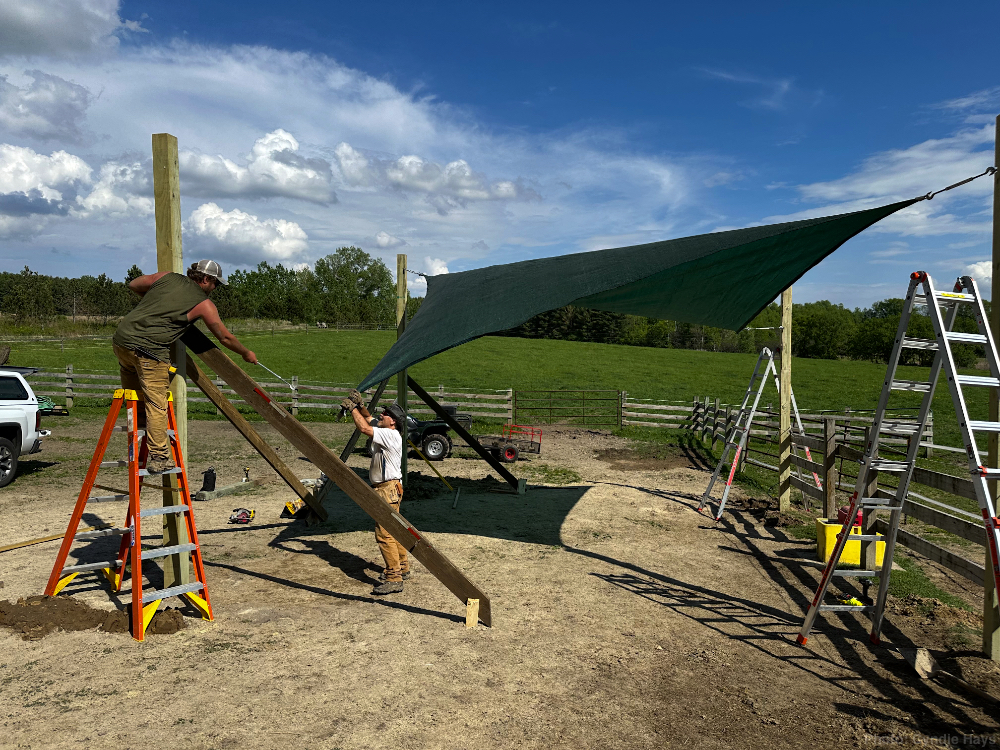
The next milestone on the shade sail project has been achieved; the sail is up in the small paddock, hanging from 4 new posts. We aren’t finished with the project yet, as there are currently extra braces in place, and we plan to add some 45° angled supports to the header boards and then cut off the extra length of each header. At that time, we may also trim away the extra post height at the top of the two posts where the sail attaches at a lower point.
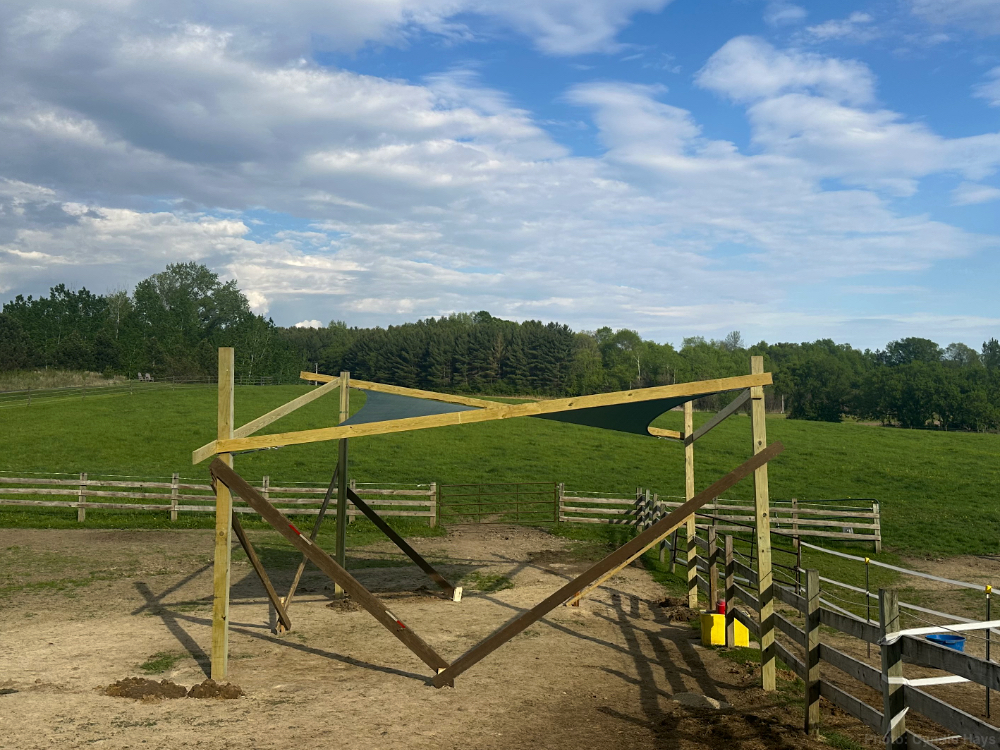
Leaving all the extra lengths is just a precautionary decision in case we decide we want to make adjustments to the geometry for any reason. We are leaving the temporary supports in place to allow time for all the earth we dug up to settle around each post.
At first, the holes appeared to be dry at the bottom, but we soon saw water flowing into them. More evidence to Cyndie and me that either the water table is pretty high here or we have a natural spring in the vicinity, about 3 or 4 feet below the surface.
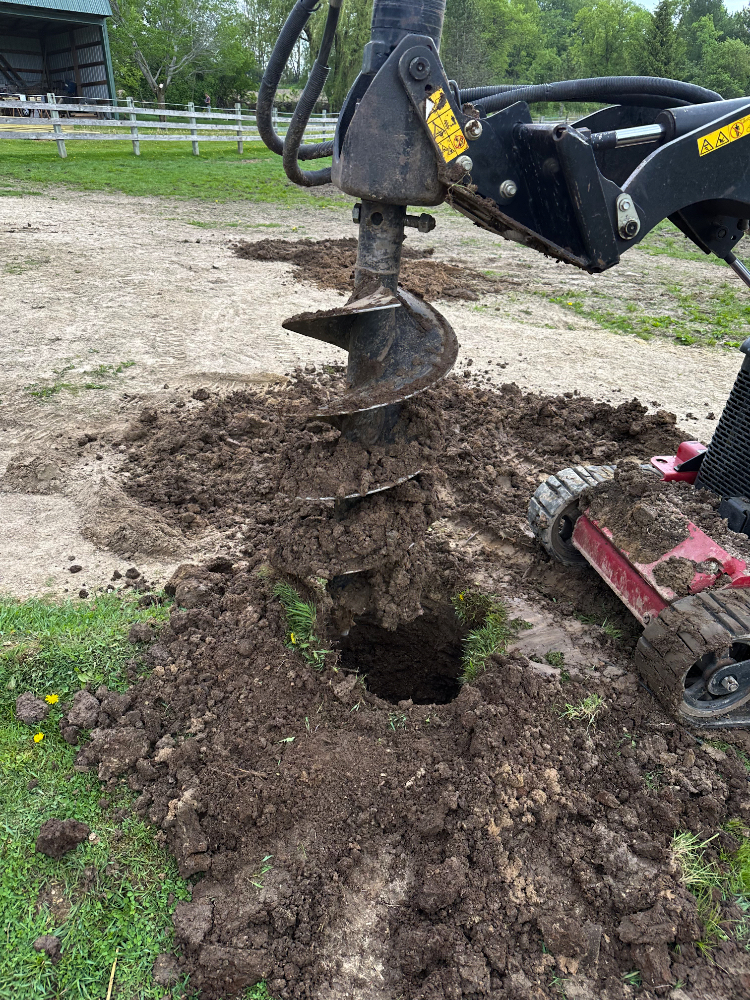

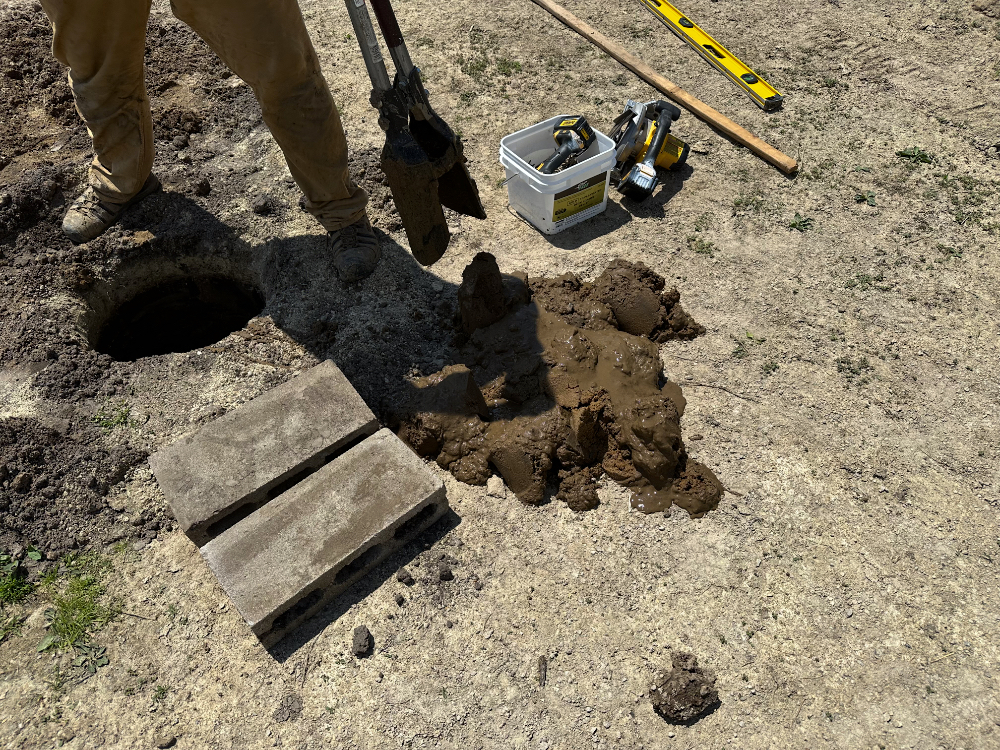
The goop coming out of the holes was like the vintage 1960s playset, “Silly Sand.” That made it a challenge to get the holes as deep as we wanted.

We even tried a sump pump to remove standing water, just long enough to establish a base of concrete blocks and gravel fill. Pumping was only moderately successful.
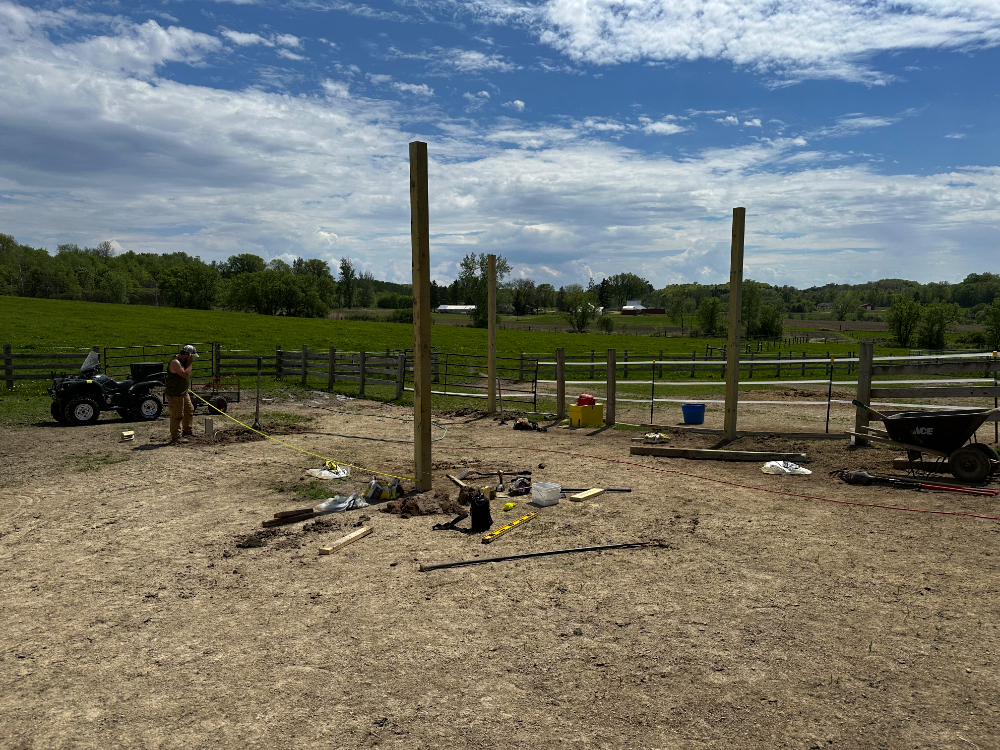
When all four posts were vertical and Justin got the eyebolts in place, it was time to retrieve the sail from the barn.
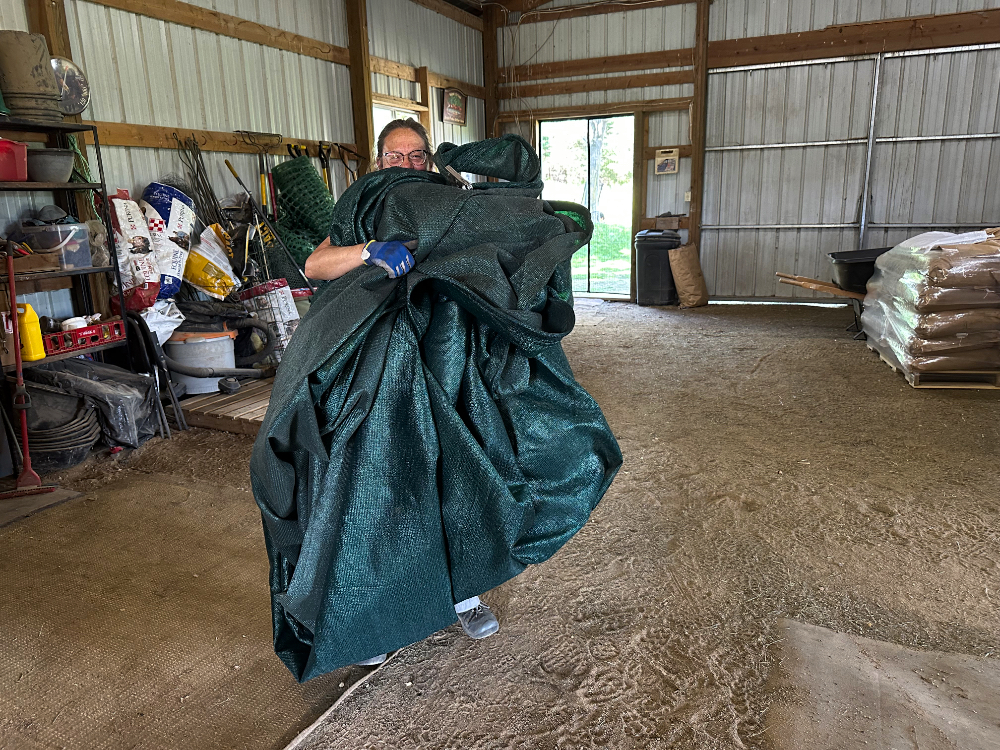
I just unhooked one corner at a time and said, “Cyndie, hold this,” for each one. Soon, she had the entire sail in her arms.
Even though there was a slight wind to contend with, the outdoor connections weren’t troublesome to make at all.
A shout-out to the heroes who contributed greatly to my attempt to bring this vision in my head into reality:
- My son, Julian, for his technical expertise in creating a virtual sail for me to play with and see how the shadow would move as the sun crosses the sky.
- Architect (mostly retired), Mike Wilkus, for his willingness to listen to me describe my thinking and offer counsel on possibilities.
- New online connection and friend, Emily Pratt Slatin, for her engineering insights from her career in the Fire Department, dealing with equipment tolerances and code enforcement.
- Contractor, Justin Schneider of HomeWorks Consulting, LLC, for the hands-on skills, tools, knowledge, and experience I lack in this otherwise DIY project.

We are relying on the header boards to counter the pull that the tightening of the sail will apply to the posts. It will clutter the super cool visual of the hyperbolic parabola of the sail, but I chose to angle the boards to offer support to that twisting look. If I change my mind after a few days of looking at the structure, there is still an option to square up the header boards around the top and leave a clean visual of the sail geometry below them.
It was a really long day in the hot sun, which made it all the sweeter when the sail went up, providing some very welcome, precious shade. I think the horses are going to find this to be a very nice addition to their living quarters.
.
.
Drying Out
Ground moisture has changed dramatically in the last 36 hours, which bodes well for my planned post-burying project scheduled for next week. The current 10-day forecast continues to show nothing but sunshine until next Thursday, the day after we intend to auger post holes. Color me eager to get that next milestone accomplished.
I had a little episode yesterday that felt like my brain might be drying out because I couldn’t find two things in the barn that I knew had to be there somewhere. After much searching for my tape measure and one of the 6” turnbuckles, I gave up and moved on with an effort to tighten the snugness of the shade sail hanging inside the barn. While moving a ladder from a rarely visited corner, I spotted the turnbuckle hanging on a hook near where I had been making adjustments a week ago.
A few minutes after that, something clicked in my brain, and I realized I had left the tape measure in the hay shed when I was cutting wood blocks for the posts. I guess it’s good to recognize that there is nobody else to blame for my missing things, but I’m a little sour about the evidence of gaps in my memory about them.
Is it possible the dry conditions are putting a bend in one of the posts waiting to be raised for the shade sail?

I noticed the bend going sideways yesterday, so I turned the post to see if gravity would make any difference in the amount of curve. If the bend remains, I figure we can use it to our advantage against the pull of tightening the sail if we install it just right.
The trickiest part of this installation for me is definitely going to be achieving the proper dimensions, which is why I contracted a professional for assistance. Well, that and the operation of a power auger to drill holes as deep as I want them. Oh, and whatever the mechanism is to get header boards attached at an angle 8-to-10 feet overhead.
We are getting closer every day to the point where I want to put up temporary barriers to block the horse’s access to the space where we will be working. It’s a balance of trying to minimize the disruption to their environment, but give me adequate time to do as much preparation work as possible before next Wednesday. I don’t know what the ideal number of days is. I’ve been going through the steps I think will be involved in my mind repeatedly, but that has yet to help me definitively decide when to start.
At this point, I figure I’ve thought about it enough that the horses already know exactly what is about to happen, so I probably don’t need to worry about them at all. I expect they just want me to get on with it, give them the shade, and be done with the whole project.
If that is true, then it just shows we are of like minds. I would like to be done with it, too.
.
.
Between Showers
We received rain in several waves that lived up to the weather forecast for yesterday. Despite the precipitation, we pulled off a few good projects on our to-do list for this week. First off, the horses had a morning appointment with the farrier.
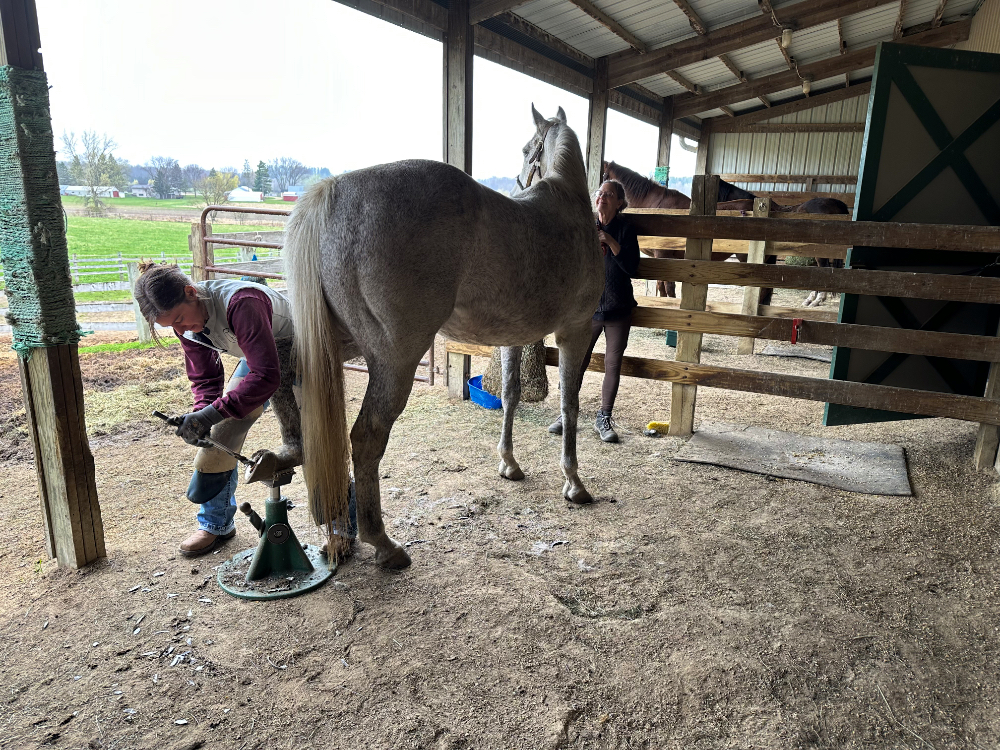
Heather reported a significant amount of growth in hooves since her last visit. The horses were reasonably well-behaved throughout each of their trimmings. Mix was unnecessarily fussy about the confinement we forced on her for all of an hour and a half, but stood well when that was required for Heather to do her thing. The herd returned to calm as soon as halters were removed and gates all reopened. They didn’t waste much time getting back out on the fresh grass.
For my next project, I decided to set up under the hay shed roof to cut some blocks of wood for the shade sail posts going into the ground.
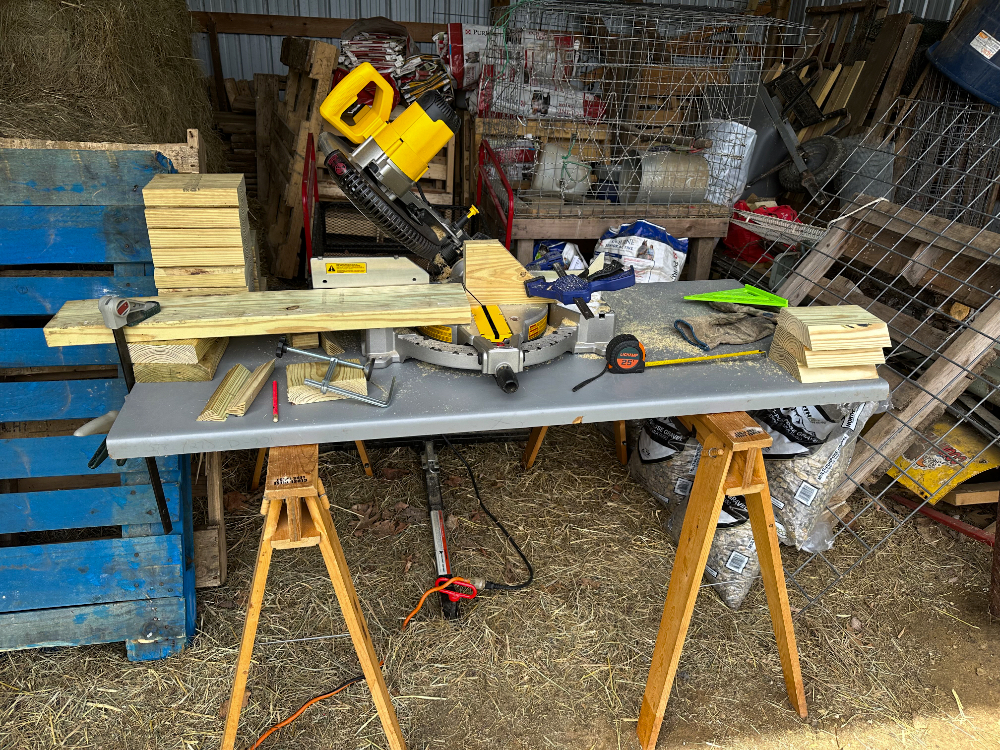
The plan is to screw these blocks onto the 6×6 posts to add a ledge that will resist forces pushing upwards. I decided to get fancy and cut angles in the bottom side of each block so there won’t be a flat surface to push against from below. Since these blocks will overlap on one end all the way around the square, I made one additional cut at a compound angle to mate the slant of the adjacent block.
Go ahead and try to picture that in your head, if you can figure it out. It was all rather experimental for me, having no experience with this level of carpentry. I’m understandably chuffed that I achieved the result I was after and only needed to cut one extra block due to a mistake.
For reasons that escape me, the horses came back to the paddocks and hung around nearby as I worked. You’d think the repeating loud buzzing sound of the saw starting and stopping would drive them off, but it was just the opposite. It made me happy to have them linger in the vicinity while I was in production mode.
When I was finished with that project, I looked at the radar and saw that time was limited until the next batch of rain. I decided to take a crack at mowing the labyrinth between showers.

I made it all the way through the labyrinth and cut a lot of the surrounding area before it started to sprinkle again. It was light enough rain that I was able to keep mowing until I finished everything I wanted cut.
For the first time in several years, we are expecting a dry, sunny day for World Labyrinth Day tomorrow. We are not in the best climate zone to show off our Forest Garden Labyrinth in early May, but we make due. It’s a little like having a flower show without any flowers. That doesn’t mean a person can’t enjoy taking a meandering stroll down the curving path while meditating on global peace, but it would be that much more inspiring to have leaves on the branches and flowers on stems.
.
.
Mixed Result
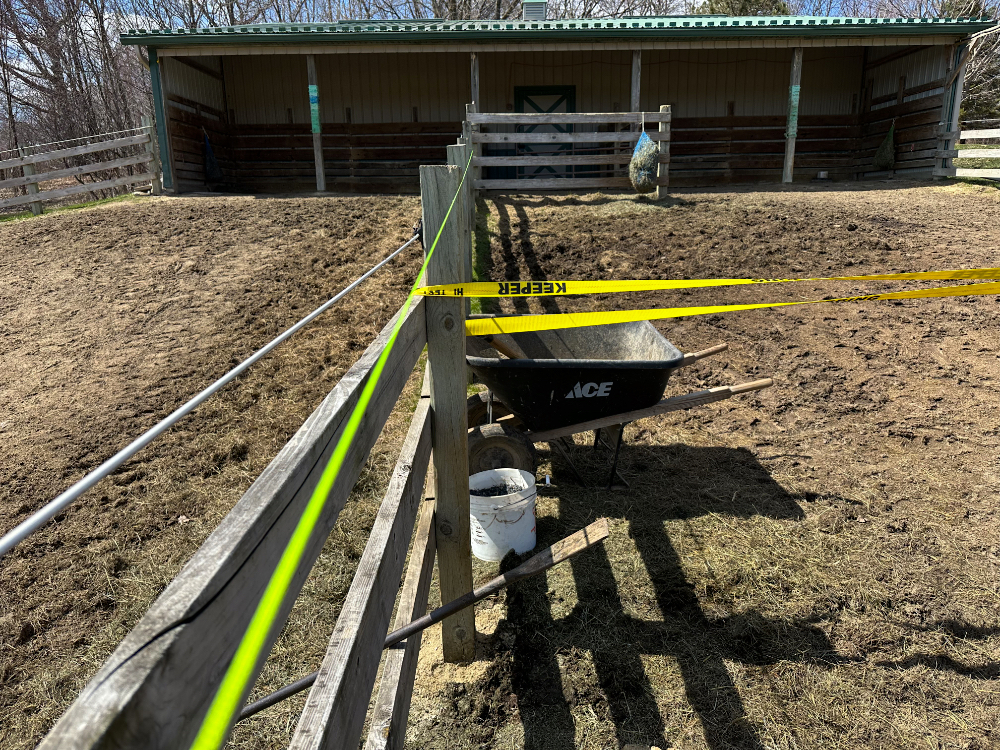
My mind continues to linger on the shade sail project even though our contractor, Justin, won’t be available to do the post-installation until 10 days from today. I’d like to do as much preparation as possible before his hourly rate kicks in, so I decided to work on the leaning fence line yesterday.
The first thing I did was tie a guide string that indicates the straight line originally established for that length of fence. Then, I stood and stared at it for a long time, wondering how to go about the multiple steps that would be required.
- I knew I would be unscrewing horizontal boards from the posts.
- I wasn’t sure how to manage the pending curiosity from the horses.
- I was hoping to pull the uphill post that will end up being replaced by the new shade sail post.
- The other post to be replaced has a gate attached to it.
- Where do I put the gate when it has been removed?
- Can I temporarily put fence webbing to keep horses from trying to cross there?
- Maybe I could pull the other posts upright before pulling the gate post.
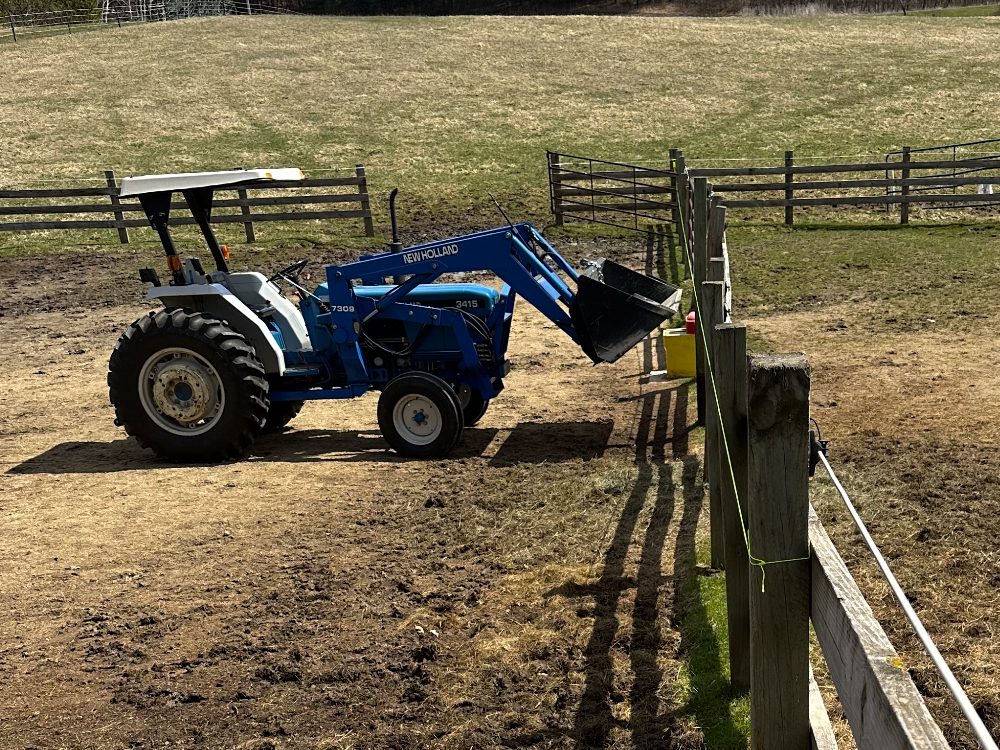 I opted for pulling the first post because that seemed the most straightforward. The only way I could imagine successfully extracting that post and persuading the rest of them to stand back up straight was to use the diesel tractor.
After wrapping a chain around the hook on the loader bucket and then the post to be pulled, the slight touch of the lever lifted that post flawlessly. That’s the way I wish all things worked.
Next, I moved the tractor back and wrapped a tie-down strap around the next post over to apply pressure against the weight of the tractor. I’m sure the come-along would have been the more appropriate choice, but it was up in the shop garage, and the strap was right there to grab. I’d already made more trips back and forth to get one more thing than my sanity in the moment wanted to tolerate.
 I was able to bring the post in line and only lost a little of the upright level when releasing the pressure. Looked straight enough to the naked eye. Moving to one of the two most tipped posts, which happen to be on either side of the waterer, I repeated the routine with the strap.
That post offered much more resistance than the first one. I’m going to need to do a lot more digging in order to gain the inches needed to get it in line again.
It was getting close to feeding time for the horses, and I wanted to get everything put away before starting that process. That meant repeating the routine of trips back and forth to carry all the stuff I had brought out throughout the hours of trying one thing after another to achieve my goal.
I made enough progress in the end to feel successful about my efforts, although I didn’t realign as many posts as I hoped. Luckily, I have plenty more days to fiddle around with this before the sail frame installation officially gets underway.
.
.


